Author: toppyhem
A Brief Guide to Installing Rough Electricity After Electrician College
June 21, 2022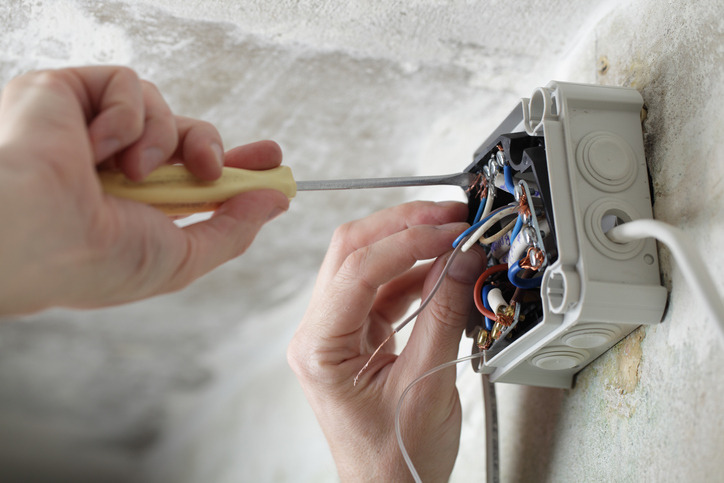
Rough electricity installation, or the initial installation of electricity prior to the addition of drywall, insulation and other barriers, is a fundamental component of a construction electrician’s responsibilities. If you’re considering this career path, electrician college is the perfect starting point, preparing you to qualify for an apprenticeship and eventually, a job.
At North American Trade Schools, both the classroom and lab sessions will give you the foundation you need to apply your skills in an apprenticeship and in your future role. Through courses such as Basic Electrical Theory, Electricity Principles and Applications, and Building Layout and Blueprint Reading, you’ll gain experience understanding general electrical concepts. While working independently as well as collaborating with a team, you’ll gain hands-on skills necessary for a successful career.
Below, continue reading to learn more about the process of rough electricity installation, a key component of your future curriculum.
Planning and Layout Process
During electrician college, your course Building Layout and Blueprint Reading will come in handy for the first phase of rough installation. Whether you’re working on a home, condo, or commercial building, each print will be different, and you’ll need to analyze them to help you begin your work layout.
Planning the layout begins with determining where your boxes will be placed, and subsequently installing them in the correct areas. This is an important step in ensuring that the plugs are accessible in every area, and your hands-on training at NATS can help you develop the attention to detail required for this step. It’s crucial to note here that if the box is crooked, poorly supported, in the wrong place, or an incorrect model, corrections will need to be made.

Preparation, Drilling, and Pulling Process for Electrician Training
After planning and box placement is complete, you can expect to move onto other preparation measures that lead into the drilling phase. Planning how to run your wires will help you determine where you need to drill, as you determine the best route to take for each one.
Based on your initial planning, you should be able to decide which wire size is needed for your wire pulling. Getting comfortable with varying wire sizes, their uses, and their ideal locations during your electrician training is highly encouraged, as it will help you to efficiently determine these solutions in the future. Once you know the necessary wire size, you can strip the insulation and insert the wires into the box as planned.

Completing the Electrical Box
It can take some finesse to leave a tidy electrical box once your work is complete. However, it’s worth taking the time to do so, because work is much easier to accomplish when the wires aren’t crossed.
Aside from sorting out each wire, other tips for a tidy box include creating a service loop, leaving some slack on the bond wire before screwing it down, and taking advantage of the space that’s available to you. After splicing your wires, you’ll want to make sure to leave them in a braid so that they’re collected and tidy. At NATS, not only will you receive the hands-on training necessary to help you feel confident on the job, but you’ll also learn from industry experts to guide you along the way to success.
Interested in attending electrician school?
Contact North American Trade Schools for more information!

Are you a detail-oriented person looking to turn their affinity for “handy” tasks into a profession? As a cabinetmaker, you’ll be crafting furniture, art and more from wood, using your knowledge of woodworking and modern tools to produce high-quality creations. Your passion for innovation will help you to turn a vision into a step-by-step project, applying your skills to carry your work from conception to completion.
With training at North American Trade Schools, you’ll gain the practical experience necessary to pursue a career in this field, equipped with industry-relevant skills and techniques. You may decide to work in a team for a construction company, furniture manufacturer or contractor, or take on projects at your discretion as a self-employed cabinetmaker.
Whatever path you choose, your day-to-day work will be both engaging and hands-on. Below, make a more informed decision about your career by discovering what a day on the job could look like as a professional cabinetmaker.
Daily Responsibilities of a Professional With Cabinet Making Training
After cabinet making school, you’ll have a few key responsibilities to attend to on any given day. As a cabinetmaker, you’ll be working on various projects at a time. In order to complete each project, your duties might include:
- Studying blueprints and plans for upcoming projects
- Measuring dimensions of different wooden components for assembly
- Using woodworking machines to shape components
- Assembling, trimming, fastening and reinforcing various parts
- Sanding, polishing or staining finished designs
- Repairing various types of wooden furniture
While these are just some of the duties you may be responsible for, you can expect to perform any of these on a given day on the job.

Weekly and Monthly Duties
While there are a number of responsibilities you’re likely to complete on a daily basis, after cabinet making training, there will also be a few tasks which you’ll complete on more specialized occasions.
For one, you’ll hold consultations with clients and potential customers, listening to their requests, specifications and goals, and drawing up potential projects based on their parameters. After these sessions, you’ll likely draw up work estimates for clients to give them an idea of what the project entails.
You may also need to conduct routine maintenance on the machinery and equipment you use, cleaning and inspecting your tools for signs of damage or wear and tear. If you use machinery that’s programmed by a computer, you’ll also need to reprogram this machinery regularly.

Work Conditions
As a cabinetmaker, your working conditions and environment will depend on the nature of your employment. If you work for a construction company or furniture manufacturing company, it’s likely that you’ll be working in teams, using a variety of woodworking machinery. If you’re self-employed, you may work out of your own home or garage, travelling to clients’ houses to get a better idea of their specifications.
As you complete your training and apprenticeship, gaining experience in the industry, you’ll have a better idea of the kind of organization you’d like to work at, or even the type of cabinetry you’d like to specialize in.
Ready to enrol in cabinet making courses?
Start training today with a program at the North American Trade Schools!

As the weather gets warmer and the days get longer in the Northern hemisphere, we’re getting excited for all the joy that summer brings. Homeowners might feel carefree after making it through a long winter. However, they often tend to forget that just like in the colder months, houses can experience plenty of damage during the heat of the summer. Issues can arise in roofs, piping systems, floors, foundations, furniture, and decor.
At the North American Trade Schools, you’ll build the skills you need to provide clients with a professional and thorough home inspection. With your experience, you’ll also be able to offer your clients advice for protecting against and dealing with damage inflicted by summer temperatures and sun. Keep reading to discover four types of damage caused by warm summer weather.
You May Identify Roof Damage After Home Inspector Training
Like snow and ice, the sun can also affect the condition of your client’s roof. In homes with attics, heat and humidity can get trapped due to poor air circulation, causing the hot air to build up under the roof. This humidity can cause damage to roofs by weakening them, causing shingles to deteriorate faster and creating mold growth.
Students pursuing home inspector training learn about a variety of roofing topics, including how to inspect roofs and identify the warning signs of wear and tear. Students will also learn about sloped and flat roof construction, and the biggest causes of common roof problems, including heat and humidity. During your home inspector career, look out for signs of roof deterioration due to the summer weather.

Dry Soil Can Ruin the Foundations of a House
If you’re working in places prone to extremely high temperatures, it’s essential to know how to inspect the foundation of a house for signs of heat damage. When the weather is hot and dry in the summer, the soil around a home may dry out and shrink. This causes the soil to separate from the footing, or the lowest component of the foundation located 12 inches beneath the frost line of the soil. In a home inspection program, you’ll learn how to spot the signs of soil separation, enabling you to help homeowners identify potentially dangerous damage to their house’s foundation once you begin your career.
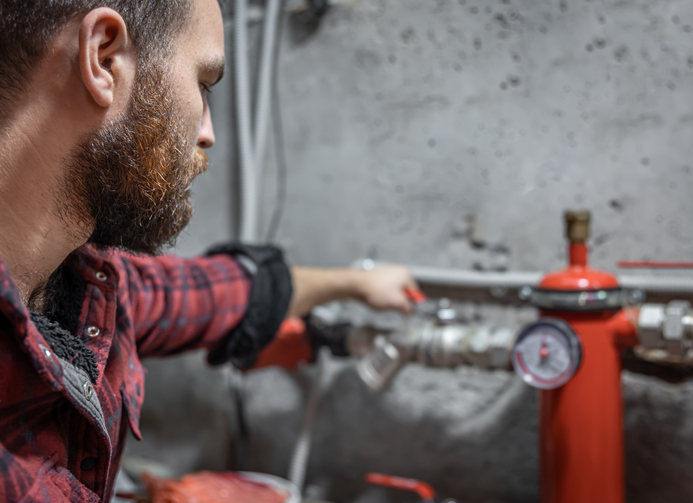
High Water Usage Can Burst Pipes and Plumbing
When temperatures rise, unfortunately, so does the risk of a pipe bursting. After you become a home inspector, your clients may experience summer plumbing issues, both due to the higher water usage or excessive dryness in the air which accompany summer. These factors can cause loosely-sealed pipes to leak or burst, leading to ruptured or disconnected water lines.
During your time at NATS, you will learn how to inspect plumbing systems in order to check for signs of leakage, wear and tear, or other issues. There are four major components to review when inspecting plumbing systems, these are:
- Supply piping
- Water heaters
- Waste piping
- Plumbing fixtures
As an inspector, it will be your job to thoroughly examine each of these components, determining if anything needs to be fixed.
Hardwood Floors Grow and Shrink as Temperatures Change
Hardwood floors are also susceptible to damage from summer weather. Similar to a living organism, hardwood floors grow and shrink as temperatures change. When it gets hot and humid, these floors will swell up, as the moisture in the air fills the gaps under the baseboards.
At NATS, our Insulation and Interiors course teaches our students how to inspect early signs of damage within interior housing elements, including flooring. As a home inspector, you can use your training to identify affected hardwood floors. Additionally, you can help your clients prevent damage to their flooring by advising them to close their windows and turn on their air conditioning during high-humidity weather conditions.
Interested in a home inspector career?
Contact NATS for more information about our program.
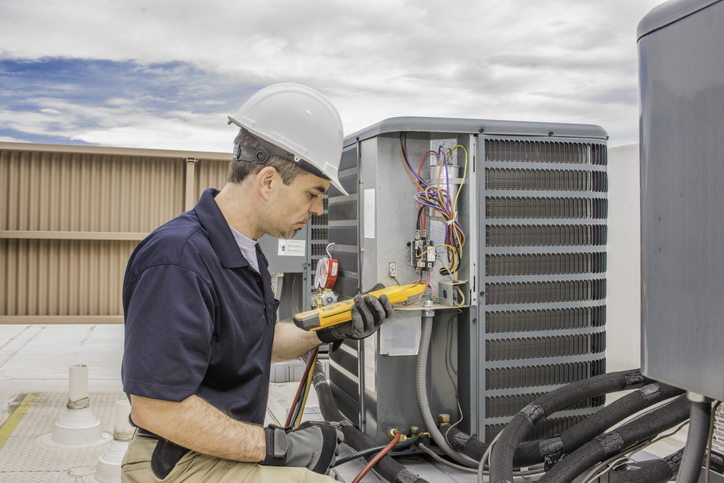
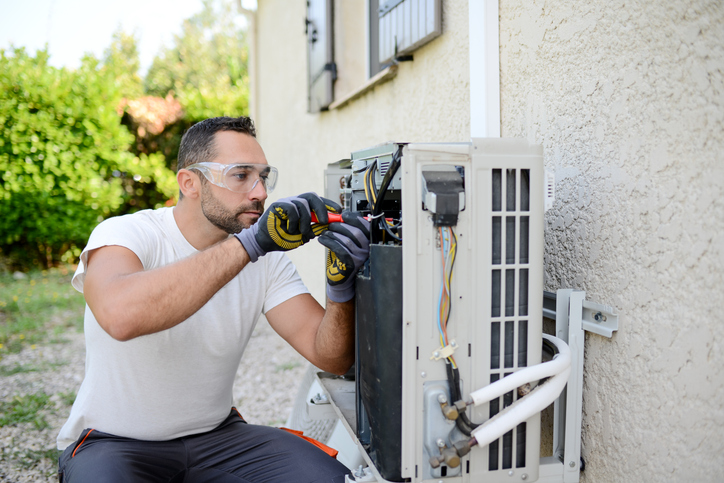
If you’re pursuing an HVAC career, one of your main responsibilities will be to service and repair air conditioning units. Along with other routine maintenance tasks, you’ll need to perform refrigerant pressure checks. Refrigerants are chemical compounds which absorb heat from the surrounding environment. During a refrigerant cycle, refrigerants will repeatedly change from a fluid to a gaseous state depending on their temperature, moving through the cycle’s components in order to reroute heat to other areas. Refrigerants are used mainly in air-conditioning systems, heat pumps, refrigerators, and freezers.
At NATS, you’ll receive hands-on training to pursue an HVAC technician apprenticeship, learning how to install and maintain gas and propane heating systems, air conditioning units, and ventilation equipment for both commercial and residential environments. Below, get a head start on your training by discovering a few key things to note about checking refrigerant pressure.
Checking Refrigerant Pressure Requires an Understanding of the Refrigerant Cycle
As an HVAC technician, understanding the ins and outs of refrigerant pressure won’t be possible without basic knowledge of refrigerant cycles. Refrigerant cycles consist of four basic components: the compressor, condenser, expansion device, and evaporator. The compressor is what uses the most power in an HVAC system–responsible for compressing gaseous refrigerant in a cooler state to a high-pressure, high temperature vapour. From here, the refrigerant is cooled by the compressor, a coil filled with hot refrigerant which wraps around the system to diffuse heat. Next, the expansion device works to reduce the refrigerant pressure quickly to prepare it for evaporation. Evaporation will occur in the evaporator, which boils the refrigerant. Through these exchanges in energy and changes in matter, refrigerant regulates the temperature of a system.
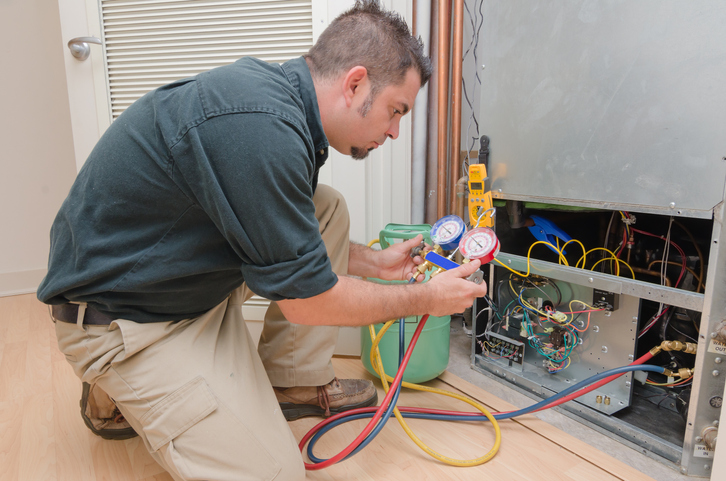
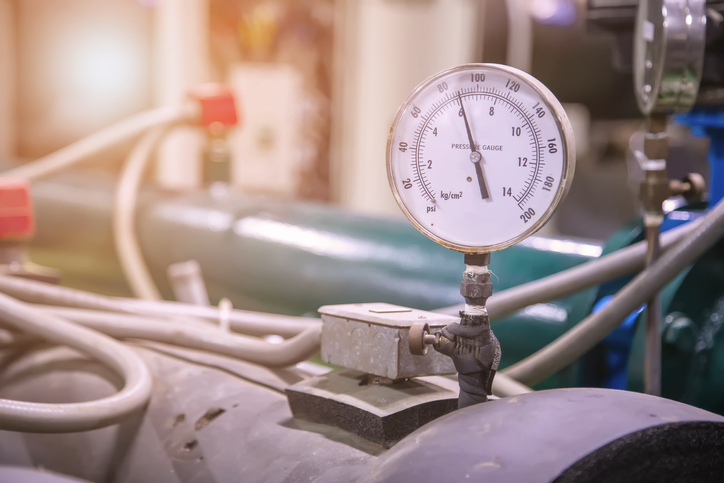
What Condensing Pressure of a Refrigerant Means for an HVAC Technician
When refrigerant changes from a gas to a liquid within a cycle, this creates what’s known as condensing pressure; a form of condensation. This occurs when refrigerant moves through the condenser, releasing heat as its temperature drops to the temperature of condensation. The condenser is a cooling system composed of tubes which expand over a large surface area to remove the greatest possible amount of heat. The condensing pressure, which results from the release of heat and sudden drop in temperature, can be read by a pressure gauge. While this gauge can be placed anywhere between the metering device and compressor, it should be placed as close as possible to the condenser in order to obtain an accurate value. During your HVAC technician career, it’s important to remember that a higher-than-normal pressure could indicate problems with the condenser coil, broken or faulty fans, or even leaking refrigerant.
Evaporating Pressure is the Opposite of Condensing Pressure
When you enrol in HVAC technician courses, you’ll also become familiar with refrigerant’s evaporating pressure. A refrigerant’s evaporating pressure is the opposite of condensing pressure. During this phase, the refrigerant chemical compound is vapourized, changing from a liquid to a gaseous state and absorbing heat from its surroundings. When the refrigerant moves through the suction line and evaporator, the valve and line pressure drop. As with condensing pressure, the evaporating pressure can be read using a pressure gauge that’s situated and connected anywhere between the compressor and metering device. A refrigerant’s chemical compound enters the evaporator as a low pressure, cold liquid, but as it absorbs heat, it begins to boil and evaporate.
Are you interested in HVAC school?
Contact NATS for more information about our training programs!

If you’re aspiring to become a home renovation technician, it’s important that you understand the technical skills of the trade. However, as a home renovation student, it’s also important to possess certain characteristics which will help you to succeed in your training and beyond. Soft skills and attributes such as communication, adaptability, and trustworthiness are crucial to a long career in home renovation, defining the quality of your work and your success in the industry.
At North American Trade Schools, we offer hands-on training in the residential construction and remodeling industry. As a home renovation technician student, you’ll learn basic carpentry, interior and exterior finishes, basic plumbing, cabinet making, roof construction, and more. Possessing these technical skills, along with a few key qualities, will enhance your work during the pre-apprenticeship training program and throughout your career.
Read on to learn about some of the characteristics that make a successful home renovation student.
Good Communication Skills in Home Renovation School and Beyond
For a student in home renovation training, it’s important that you’re able to communicate clearly and effectively with your peers and instructors. During your pre-apprenticeship program, you’ll be working inside labs and classrooms designed to help you develop and improve upon relevant technical skills. With communication skills, your ability to collaborate with students, ask questions, and determine key information will help you to successfully complete the projects you’re working on.
Possessing excellent communication abilities as a student will also give you a leg up when working with your future clients. After your home renovation training, you’ll be providing services for clients who are on a tight budget and deadline. They’ll expect you to understand their demands, while updating them on project-related progress or issues on a regular basis. Being an excellent communicator prevents renovation mistakes and delays from occurring, resulting in smooth correspondence between you and your clients.

Trustworthiness is an Important Characteristic to Have
Trustworthiness is one of the most important characteristics to build, both when you’re training to become a home renovation technician and throughout your career. Whether personal or professional, relationships require trust in order to be sustainable. If you’re working on hands-on projects with fellow students, you’ll need to be honest with yourself and them when learning and handling certain tasks. If you feel something isn’t working the way it should, or you’re unable to accomplish a certain task without guidance and support, it’s important to be upfront rather than make excuses.
As a home renovation technician, the same goes for building relationships with your clients. From the moment they hire you, your clients will expect you to be honest and transparent with them about the home renovation process. Thus, when completing projects, it’s important to avoid cutting corners and ensure that you’re telling the truth in the instance of mistakes or delays. This builds trust and demonstrates your willingness to form a beneficial relationship through the renovation process.

Successful Students Show Adaptability
Adaptability is another characteristic that’s crucial for home renovation technicians. In order to be a successful student and professional in this trade, you’ll need to readily adapt to situations that arise during projects, or changes which impact the industry. While performing remodeling or renovation work for your clients, you may face some unforeseen challenges and obstacles, requiring you to adapt by making a new plan or going a different direction with a project.
Additionally, the techniques, tools, and products that you’re accustomed to using may change as technology and trends continue to influence the industry. As a home renovation technician, your ability to anticipate change and readily adapt will help you to remain competitive in the field, and improve your ability to innovate while working on projects. If you already possess these qualities, or are interested in developing them, home renovation training could be a great fit for you!
Interested in home renovation school?
Contact NATS for more information on our program.
Industry Trends to Watch for After Electrician Training
May 17, 2022
Trends are always changing for industries as they adopt new technology and sustainability initiatives. This is especially true for the electrical industry, which seems to be moving at a tremendous pace towards a bright future. For an aspiring electrician who’s pursuing a career in the electrical industry, it’s important to be aware of the new trends that are shaping the industry today. The electrical industry is making strides in innovative solutions that will make your career that much more exciting.
At NATS, you’ll get hands-on training through our Construction and Maintenance Electrician program. You’ll learn wiring, service installation, code interpretation, conduit bending, and more for residential, commercial and industrial electricity, as you prepare yourself for upcoming trends in the industry. So, read on to learn more about some of the top industry trends!
Smart Cities Will Be a Big Hit After Your Electrician Training
The electrical industry will see a rising trend in the use and implementation of the smart city framework. A smart city is considered a network made up of information and communication technologies that deliver smart sustainable efforts directed at challenges affecting a growing urban population. A smart city gives the people and their governing bodies the power to make better choices for themselves.
After you complete your electrician training, you’ll be amazed at how a smart city allows people to receive, analyze and oversee data in real-time, which helps them make important decisions that improve their quality of life. Residents of a smart city can monitor their electricity usage and energy consumption through their smartphones and be connected to electrical companies that can also monitor data in real-time. This will help resolve any electrical issues as they occur while improving sustainability and reducing cost.

The Arrival of Augmented Reality to Help With Electrical Work
With the use of augmented reality (AR) being utilized in various industries, it’s about time the electrical industry got on board as well. Augmented reality is becoming a useful technological advancement that’s making its way into the electrical industry, as it helps with electrical projects and tasks. After finishing your training at an electrician school, you may get to wear one of these devices on the job.
Augmented reality can help you plan out an electrical project as you see its conceptual design right in front of you. You can use AR to assist you in planning for electrical wiring at a residential, commercial or industrial building, or to determine how to fix a faulty electrical panel. AR also gives you the flexibility of offering support to fellow electricians or trainees while they’re working on a project, without you having to be present.

Sustainable Materials Are Becoming Major Players in the Industry
With customers becoming more conscious of the environment, it has become imperative for many industries to develop innovative solutions that will allow them to offer sustainable and eco-friendly products and services to customers. The electrical industry is also answering that call.
As an electrician, you’ll probably be making environmentally conscious strides throughout your career as you work on implementing and installing energy-efficient products for different types of buildings or within smart cities. Electrical companies are also shifting their focus toward sustainable operations and offering transparency within their business practices, as they meet consumer demands for energy-saving initiatives.
Interested in an electrician college?
Contact NATS for more information on our training programs!

As an aspiring home inspector, you’ll be the go-to person when it comes to helping home buyers make informed decisions about their new homes. Your services will be needed to inspect the condition of homes and any signs of defects. Often, those signs will be around the insulation of a house. Knowing when the insulation needs replacing is important to ensure that the temperature is regulated properly throughout the house.
At NATS, you’ll get hands-on training in home inspection. You’ll learn about the systems and components of a house, which include roofing, structure, electrical, air conditioning and heat pumps, plumbing, insulation and more. You’ll learn what problems to look for when performing a home inspection–and insulation problems are some of them. Read on for a look at some of the common insulation problems you’ll encounter.
Expect to See Animal Damage to the Insulation During Your Home Inspector Career
Properly inspecting your customers’ homes for insulation can save them a lot of money down the line. It’s important to inspect the interior and exterior of the house when it comes to insulation, especially for damage caused by pests. Fiberglass insulation–the most common form of insulation found in homes–is at risk of becoming a shelter for unwanted visitors that roam around the walls of your customers’ homes. Throughout your home inspector career, you’ll become accustomed to the signs of insulation damage caused by animals. Many rodents like squirrels, mice and rats can create cracks or gaps in the insulation, causing heat to escape to the outside. To verify the source of the problem, look for signs of animal droppings and hair, as well as broken fiberglass outside and inside your customers’ homes.

Mould Build-Up in a Home’s Insulation
Another insulation problem you’ll probably encounter after you become a home inspector is mould build-up. Mouldy insulation is costly to fix if not caught early and can cause severe health complications for your customers, especially for those who suffer from respiratory problems or allergies.
Mould can be caused by water damage to the walls, basement, roof or other parts of a house. The condensation and dampness of cold walls will eventually cause the insulation to develop mould, which can spread around your customer’s home. As you inspect your customer’s home, look out for any black, grey or green patches on the walls, floors and insulation. If these are visible, your customers have a mould problem on their hands that needs to be addressed right away.

Out With the Old and In With the New
When inspecting your customers’ homes, you may also notice that the insulation has deteriorated over time. Insulation, just like anything else, doesn’t last forever. Insulation usually lasts between 15 years to 20 years, before it needs inspecting and replacing. You’ll probably notice drafts, mould and ineffective heating transfer throughout the house when it’s time for the insulation to be replaced. You should advise your customers not to take matters into their own hands when replacing fiberglass insulation, due to the health risks associated with breathing in asbestos and fiberglass particles. While inspecting your customers’ homes, ensure that you inspect the basement, attic and duct for any signs of wear and tear.
Are you interested in home inspector training?
Contact NATS for more information about our training programs!

Cabinet making is an art. For a cabinet maker who enjoys working with wood and creating top-notch cabinets, you’ll need the right tools for the job. Pneumatic tools make the top of the list of useful equipment to have in your career. Pneumatic tools are considered cheaper than electric tools. They are more precise and lighter to handle, which is an added bonus when your hands are getting tired from working away at the wood.
At NATS, you’ll get pre-apprenticeship training in cabinet making that’ll provide you with the hands-on skills needed to launch your career. You’ll learn about wood design and layout, identifying and selecting wood, reading blueprints, operating woodworking machines and pneumatic tools and much more. Let’s take a closer look at the pneumatic tools you’ll get to use in your cabinet making career!
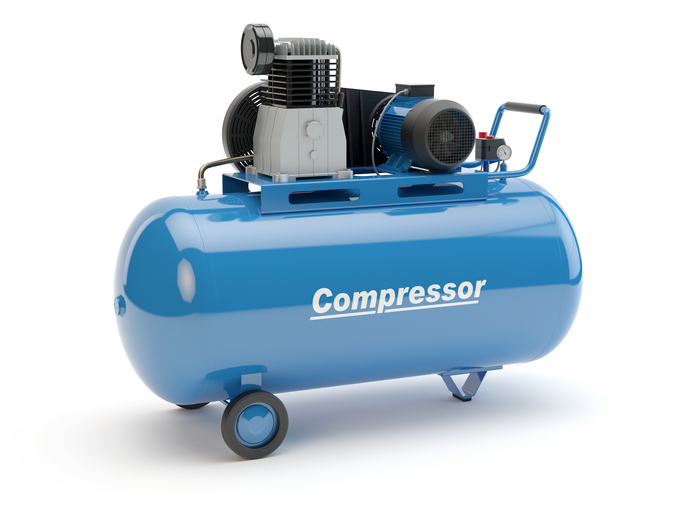
1. An Air Compressor Is a Must After Cabinet Making Training
If you want to get the job done well using pneumatic tools, then you’ll definitely need to use an air compressor around the woodshop. It may seem noisy and a bit on the large end at first, but simply put, it’s safer and much cheaper to use when you need controlled power out of your tools. After you complete your cabinet making training, you’ll make use of air compressors to supply power to staple guns or nail guns and manage pneumatic jigs and clamps. You’ll probably encounter common air compressors that make use of a pump known as a positive displacement model, which forces the supply of air into the tank. Some of the smaller compact air compressors only use oil-free pumps, offering you the luxury of minimal maintenance.
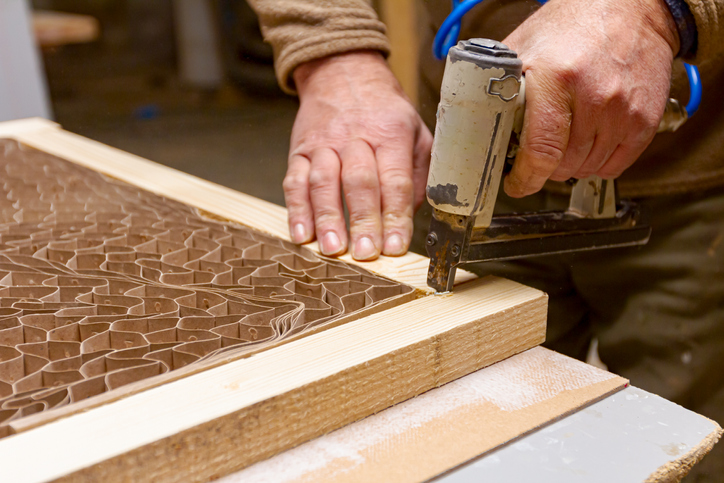
2. You Can’t Go Wrong With a Speedy Pneumatic Staple Gun
A pneumatic staple gun is a powerful and essential tool to have by your side after you complete your training at a cabinet making school. Pneumatic staple guns are used to add finishing touches to cabinets that aren’t usually visible to the naked eye. You’ll use this type of staple gun to fasten the backs of cabinets, assemble cabinet door jambs and fasten tongue and groove cabinet boards. The pneumatic staple gun offers speed and accuracy, powered by the air compressor with the use of a trigger and a cartridge. With this kind of air supply, an electric staple gun can’t match a pneumatic staple gun for power when it comes to working with wood in cabinet making.
3. Drive Nails With the Pneumatic Finish Nailer
When it comes to driving nails as a cabinet maker, nothing seems easier and faster to use than the pneumatic finish nailer. It provides an instant trigger that shoots the nail straight into the piece of wood. The finish nailer carries 15 to 16-gauge finish nails that offer size and stability for cabinet-making projects. It’s also considered a versatile tool since it can be used with various materials and surfaces. The finish nailer also has a convenient feature that allows you to determine the depth at which you want to insert the nails, without the need for any additional tools.
Are you interested in cabinet making courses?
Contact NATS for more information about our training programs!

For an individual who’s aspiring to have a successful and rewarding career, becoming a professional welder may be the right path for you. Welding is a fabrication process that uses heat and pressure to join metals or thermoplastics together. A welding career can take you to many different industries, from manufacturing, construction and mining to the aerospace, shipbuilding and military industries.
At North American Trade Schools, you’ll get hands-on and theoretical training in the welding practice. Through our pre-apprenticeship welding program, you’ll learn how to use modern equipment in welding processes for Gas Metal Arc Welding, Gas Tungsten Arc Welding and more. So, what’s it like having a welding career? Read on to find out!
After Your Welding Classes, Keep Safety Top of Mind
The first thing you need to know about welding is that as soon as your workday starts, you’ll be changing into your protective uniform and gear. Without the proper protective equipment and gear, you’re at risk of injury on the job site. After you complete your welding classes, you’ll have to make sure that you have fire-resistant clothing and gloves, as well as a protective helmet and N95 mask. You’ll then check your assigned projects and see what needs to be done for the day. At the same time, you’ll be collaborating with your co-workers and supervisors to ensure that everyone operates safely in the workspace and that the welding process runs smoothly.

Expect Excitement Each Day of Your Welding Career
If you’re looking for dynamic work that keeps you busy, then you’re in luck! After you complete your welding technician training, you’ll find yourself working in a career that’s full of interesting opportunities, different settings, and varying working hours. You may get to work on a variety of tasks throughout the day, including joining metals together, cutting through materials, repairing holes for different structures, and more. So, a long day goes by more quickly than you think.
Your career won’t just lead to work in indoor spaces or scaffolding but will give you the chance to apply your skills to outside environments–sometimes in extreme or volatile conditions. You can be sure to get your adrenaline pumping as you work away on the job. So whether you’re working as a Welder, Welder Fitter, Boilermaker, Construction Millwright or Ironworker, your day will be full of excitement. As you shift from one welding project to the next, expect variety in your daily work and the potential to develop your career as an expert in different settings.

Your Day Ends the Same Way as it Started
Just like how you started, you’ll have to ensure the correct safety procedures are followed before you leave for the day. At the end of the day, it’s all about making sure that everything is ready for other welders and for the next day of operations. You’ll have to ensure that your welding job has been completed properly and that no issues have been left unresolved. Take the time to check that all the welding equipment and tools have been switched off and stored properly. It’ll be up to you to ensure that your work area is clean for the next day and with no hazardous materials left around. That way, you’ll be ready to start the next day on the job safely and efficiently.
Interested in a welding college?
Contact NATS for more information on our training programs!
For an aspiring technician looking to work in the HVAC industry, it’s important to know the common issues your customers may encounter that’ll require your expertise in repairing and resolving those issues. HVAC challenges can sometimes have simple solutions when it comes to repairs, but if not handled immediately and properly, they can cause further damages as well as more time and money to fix.
At NATS, you’ll gain hands-on training through our HVAC pre-apprenticeship program. You’ll learn how to install and maintain gas and propane heating systems, as well as ventilation and air cooling equipment for both residential and commercial environments. Your training will prove to be valuable to customers as you work on resolving common HVAC challenges.
Read on to find out the three common challenges you’ll face in your career!
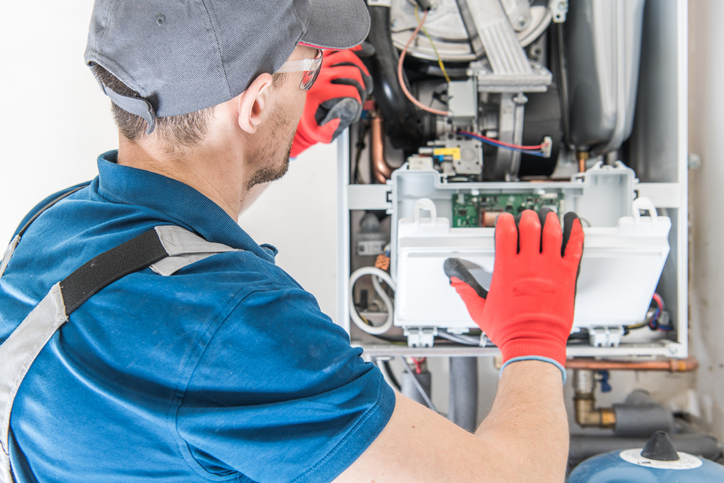
1. As an HVAC Technician, You May Encounter Pilot or Ignition Issues
One of the common HVAC challenges you’ll encounter might have to do with the gas furnace’s pilot or ignition unit. When this issue is present, it prevents the furnace from dispersing any sort of heat around a unit or home, which can be a big problem in extreme cold weather conditions.
Ignition problems for the furnace can be caused by dirty pilots or flame sensors. As a professional HVAC technician, you’ll have to examine these furnace components, as their malfunctioning can cause short-cycling, a pilot outage, delayed ignition of the furnace burners or an entire furnace lockout. You’ll have to assess whether the furnace components have experienced wear and tear over time and need replacement, or whether the issue is related to a gas supply problem.
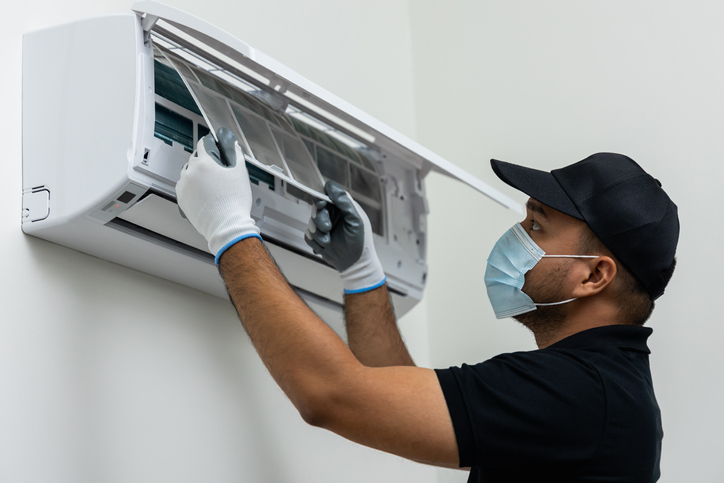
2. Dirty Filters Are Most Common
After you complete your training from an HVAC school, you may get a call from customers regarding poor airflow circulation around their homes or offices. This is most likely related to dirty air filters. Dirty air filters are the most common HVAC challenges you’ll face during your career. However, they’re fairly simple to handle and resolve.
A dirty filter will reduce the lifespan of a customer’s furnace because it places more pressure on the furnace to circulate air. It can also cause it to repeatedly overheat and shut off. You’ll have to replace the dirty filter with a new recommended filter based on its Minimum Efficiency Reporting Value (MERV) rating. The higher the MERV rating of the filter, the better it is for air quality.
2. Wear and Tear of Heating System Components
Another common HVAC challenge you may come across during your career is complaints about the heating system’s ability to generate heat for an entire office or home. This can be the result of the wear and tear of some components in the heating system. You’ll have to check the heating system for the condition of its bearing and belts. You’ll probably have to check if the belts are stretched or worn out, and if they require replacing. Additionally, the heating system’s motors and bearings might not be well lubricated, and in that case, you’ll have to oil them to allow them to run smoothly.
Are you interested in HVAC technician courses?
Contact NATS for more information about our training programs!
