Author: toppyhem
If You’re in Construction College, Here’s What You Need to Know About Electrical Motor Theory
July 20, 2021
Working in the electrical industry requires knowledge of one of the fundamental components of modern construction: electric motors. From power tools to household appliances to industrial applications, electric motors are found everywhere. Essentially, an electric motor is a machine used to convert electrical energy into mechanical energy. Electricity is passed through a coil to produce the power to drive a machine.
Given their availability in today’s world, knowledge of the theory and application of electrical motors is essential for anyone hoping to pursue a career in the field of electrical construction. Skilled professionals should have a complete understanding of electrical motor theory and its application in residential, commercial, and industrial systems. If you’re considering a career as a construction and maintenance electrician, here’s a quick look at the fundamentals of electrical motor theory!
How Do Electric Motors Work?
The electric motor works according to an interaction between the electric current and the magnetic field, which generates a force to make the shaft rotate. In other words, when an electric current passes through a coil, a magnetic field is generated that causes the coil to rotate on its own axis. Most electric motors today work according to this principle of electromagnetic induction. The mechanics of a generator work in much the same way as an electric motor – however, a generator works in the opposite direction, converting mechanical energy into electrical energy.
Students in construction college learn the principles and applications of electricity to prepare them for competitive careers as electrical control assemblers, electrical technicians, and more.

Types of Electrical Motors
Electric motors can be classified according to their power source, construction, motion output, and application. Typical motors are equipped to provide sufficient mechanical power for industrial uses in pumps, fans, power tools, and disk drives. Today, the most commonly used electrical motors are AC motors and DC motors.
DC (Direct Current) motors are widely used because they come with a pre-existing power distribution system. Their speed can be adjusted through the intensity of the electric current. The ability to control the speed makes them a popular choice for home appliances, vehicles, and elevators.
AC (Alternating Current) motors are able to reverse the direction of the electric current at regular intervals. This type of motor uses magnetic forces to propel the current through the device. The current creates a rotating magnetic field that can move the rotor. With a low starting power and controlled acceleration, AC motors are suitable for instrumentation and industrial applications.
Trained electricians pursuing a career in construction will be able to distinguish the appropriate uses of different types of electrical motors.
Advantages of Electrical Motors in Construction Careers
In application, electric motors have several advantages over normal engines. When it comes to their comparative power, the horsepower rating is similar – however, the cost of electric motors is significantly lower than fossil fuel engines. These motors also don’t use fuel, nor do they require the maintenance of engine oil. In that sense, electric motors require little maintenance with a lifespan of up to 30,000 hours if maintained properly. Not to mention, electric motors can be widely used across different appliances, including machine tools, ships, paper mills, motor vehicles, as well as heating and ventilation systems. With knowledge of the fundamental workings of electric motors, students in construction are prepared for a modern and practical career path.
Are you interested in construction careers?
Contact NATS today to learn more about our program!
5 Common Home Issues You’ll Encounter During Your Home Inspector Career
July 13, 2021
Home inspectors have an important role to play in the process of purchasing a home. These professionals have the knowledge and skills necessary to identify issues in homes that aren’t usually visible to the naked eye. They’ll also communicate with a home’s potential buyers to alert them of any possible problems, enabling them to make an informed decision before moving forward.
If you’re seeking a career as a home inspector, you’ll be visiting homes to conduct a thorough inspection, identifying damaged components, signs of neglect and more. Your success will be enhanced if you familiarize yourself with some common issues you can expect to identify in home inspections throughout your career.
Below, read on to discover five of the most common home issues to be aware of!
1. After You Become a Home Inspector, You May Encounter Damaged Roofing
Roofing damage is one of the most common forms of home damage, making it important to look closely at the roof during your home inspector career. Signs of damage can appear in the shingles, trim, and flashing, and all of these components should be closely expected. Additionally, it’s important to obtain information such as when the roof was last replaced, what the life expectancy of the roof is, and whether any repairs have been done on the roof. The roof may also show signs of leakage, and if any damage is found, the buyers should be notified immediately.

2. Water Damage Issues Are Common
Water damage can often lead to mold growth, structural damage, and leakage, so it’s crucial to address this problem during a home inspection. Check the pipes for cracks, and examine the ceiling, attic, flooring, and basement for any signs of warping, cracking, or water spots. Water damage can also be caused by drainage problems, so ensuring that drainage systems such as roof gutters and downspouts are securely installed is necessary when it comes to preventing future water damage.
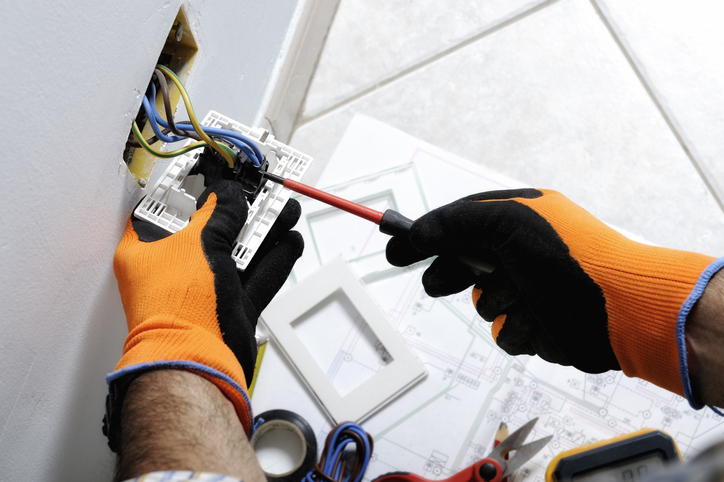
3. Check for Electrical Problems
If you want to become a home inspector, you’ll want to note that electricity problems are common in many homes. When conducting an inspection, check a home’s circuit breaker and electrical panel. You’ll want to determine whether there are any components that show signs of wear, or whether the electrical system is outdated. Additionally, inspect the wiring to see whether there are any bad connections that can be identified, and ensure that all wiring is correctly grounded. Lastly, compare the electrical system with relevant electrical codes to make sure there are no violations.

4. In Older Homes, the Foundation Can Present an Issue
Depending on how old a home is, the foundation can often present an issue. A foundation may show signs of cracking, which may be caused by environmental factors, tree roots, a lack of reinforcement, or drainage issues. As a cracked foundation can cause interior leakage and even create shifting within a home, it’s important to look out for potential problems in order to save buyers from safety hazards and hefty expenses down the road.
5. General Maintenance Problems Are Often Discovered
If a home hasn’t been well maintained by its previous owners, there will often be many signs of general neglect which should be identified during a home inspection. The paint (both interior and exterior) might be cracked, the heating and cooling system may need repair, and major appliances such as the oven, refrigerator, and dishwasher may need replacing. While these may seem like cosmetic issues, they can end up costing homeowners a lot more than anticipated down the line.
Ready to begin your home inspector training?

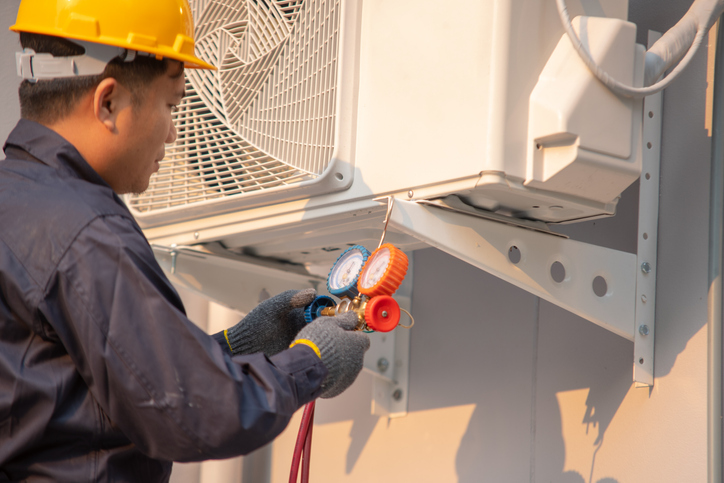
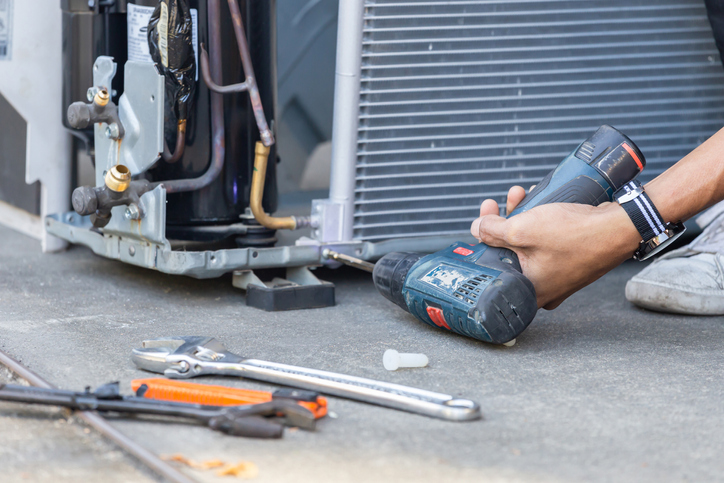
If you’re considering launching a career as an HVAC (heating, ventilation and air conditioning) technician, you’ll be entering an exciting field where your skills will be in-demand. On the job, your duties might include installing HVAC units, conducting routine maintenance examinations, replacing broken components, and more. Throughout your career, it’s important to prioritize your safety, as HVAC technicians are often exposed to hazardous materials and conditions while on the job. Chemicals such as refrigerants and contaminants–including dirt and debris–are all common to encounter as an HVAC technician. With this in mind, it becomes key to wear the proper safety gear to protect you from harm.
Read on to discover what you should have on hand to stay safe as an HVAC technician.
After Finishing HVAC College, Wear Protective Gear
As an HVAC technician, it’s important to wear clothing that protects you from exposure to both chemicals and contaminants. On the job, be sure to wear a long-sleeved shirt and long pants so as not to leave any skin vulnerable. Additionally, ensure that your clothing is free of synthetic fibers, as they’re more flammable. After graduating from HVAC school, it’s also important to wear the right boots, as proper footwear is necessary to protect your feet from the heavy machinery you’ll be working with. You’ll also need safety goggles to protect your eyes from debris, and earplugs to prevent hearing damage due to the power tools used in HVAC work. Lastly, a thick pair of gloves will keep your fingers safe from any injuries that could result from handling sharp wires or pipes.
Use the Right Tools
When you use the right tools, your safety will be enhanced throughout your career. There are a few critical tools that enable you to perform any job in adherence with industry standards—reducing the risk of malfunctions that might otherwise pose a threat to your safety. As a graduate of HVAC college, you should always have the following tools in your bag:
- Clamp metre
- Anemometre
- Wrench
- Vacuum gauge
- Refrigerant leak detector
- Wire stripper
While it’s important to have these tools on hand, it’s important to examine the quality of your tools before beginning any repair or installation. By ensuring that your tools are in good working order, you’ll be able to avoid making any dangerous mistakes on the job.

Follow these Practices When Handling Chemicals
Throughout your career as an HVAC technician, you’ll be working with and transporting many different chemicals. In addition to wearing the right safety gear, it’s also important to know how to handle chemicals on the job to reduce your risk of injury. When using gas cylinders, make sure to inspect them before filling them up, and check to make sure there are no signs of leaks or damage. You should also not have gas cylinders in your van in hot weather, as this can increase the risk of explosion. When working with any detergents, refrigerants, solvents, or other cleaning liquids, make sure to wear goggles and a protective mask over your face to avoid exposing yourself to chemicals.
With these safety rules in mind, you’ll be ready for a long career as an HVAC technician.
Thinking about enrolling in HVAC technician courses?
Launch your career with a program at the North American Trade Schools!

Cabinetmaking is an age-old skill within the woodworking tradition. Nowadays, skilled workers are applying cutting-edge tools and technology to push the trade into the modern landscape.
Graduates of cabinetmaking school open the doors to practical career opportunities in cabinet installation, store fixtures construction, and architectural millwork. In order to secure their footing in the field, graduates should know how to transform their knowledge and training into marketable skills. Employers want to feel confident that their workers have the experience and skillset to complete jobs to a high standard.
Here’s a closer look at how graduates can craft an impressive resume to land work in cabinetry!
Showcase Your Practical Experience
First and foremost, cabinetmaking is a hands-on trade. Skilled workers will need to know the fundamentals of shaping, cutting, and assembling different types of wood into a finished product. For that reason, employers are looking for someone who not only understands the theory of cabinetry, but who has practical experience working with the different materials and tools of the trade.
Cabinetmaking training combines classroom teaching with hands-on training in a lab. Students will work with industry-grade equipment–including a table saw, miter saw, drill press, joiner, edge banding machine, and power tools. When applying for a job in cabinetry, students should include examples of their practical experiences and specify how they have used different tools to complete their work. Employers may be scanning resumes for keywords, so it’s important to use industry terminology in your applications.

Highlight Employable Skills
Cabinetry is a dynamic profession for individuals with a range of theoretical and practical skills. Employers will be looking for workers with strength in design, construction, and organization. Students enrolled in cabinetmaking school will also learn the importance of soft skills. Time management and the ability to multi-task within tight deadlines are developed throughout the course. The ability to organize your work independently will demonstrate that you are a responsible and reliable worker.
As cabinetry entails physically demanding work, stamina and strength are valuable traits. Employers want to know that you are capable of performing various tasks in an efficient manner. Additionally, creativity and design skills are essential to crafting cabinets that are both functional and aesthetically pleasing. The key skills on your resume will not only showcase your personal strengths, but also demonstrate your understanding of what it takes to work in cabinetry.

Include an Official Degree From Cabinet Making School
Employers today are looking for candidates with an in-depth working knowledge of the trade. Training someone from scratch takes time and resources, and many companies are looking to hire someone with a pre-acquired skill set.
A degree from a trade school gives candidates a significant advantage in the job market. Students of a cabinetmaking program will learn the fundamentals of woodworking, blueprint reading, operating machines, surfacing techniques, and laminating procedures. They also gain practical experience using industry equipment. Upon graduating, students can immediately apply their training to a job in cabinetry. With a recognized degree from a trade school, employers can rest assured that their workers have the skills to jump straight into professional work.
Are you ready to enroll in cabinet making courses?
Contact NATS today!

While businesses across Canada have felt the effects of the COVID-19 pandemic, one industry has bounced back faster than expected. The home renovation industry has been surging over the past year, with the main driver of this boom being the pandemic itself. With Canadians forced to spend more time at home due to travel restrictions and lockdown orders, they’ve had the opportunity to focus on what might be improved within their homes.
If you’re considering a career as a home renovation technician, your skills will be in demand in the coming years as Canadians continue to invest in home renovation projects. Read on to discover more about the trends dominating Canada’s home renovation industry, and the impact that this growth may have on your future career.
Professionals with Home Renovation Training Have Been in Demand Since the Pandemic
Even before the pandemic hit, home renovations were hitting record highs across Canada. With the initial arrival of COVID-19, many home renovation projects were put on pause as Canadians cut their spending in anticipation of an economic downturn. However, as the months dragged on, more and more Canadians either opted to move ahead with their renovations or decided to begin new projects that they hadn’t considered prior to the pandemic.

If you want to become a home renovation technician, it’s important to note that about one in two Canadians are either planning to or have already completed a home renovation during the pandemic. Today, the home renovation industry is experiencing a major resurgence, and the prolonged uncertainty surrounding the pandemic has only made growth in this industry more certain.
Why Canadians Want to Begin their Renovations Now
The COVID-19 pandemic imposed more restrictions on the free movement of Canadians than ever before. Many professionals found themselves working from home, their children attending school online, and their vacations cancelled. However, for those with home renovation training, these new obstacles provide more opportunities for revenue.
Homeowners are placing increasing importance on creating a home that they want to spend more time in–whether that means upgrading their home office, putting in a new patio, or adding an extra wing to their home for recreation. In fact, 80% of Canadians cited comfort as the main reason for undergoing a home renovation. Canadians want their homes to be as livable as possible, and with the extra time that the pandemic has afforded them, they’re able to sit down and think about the renovations they want to invest in.

The Benefits of Home Renovations
While the pandemic placed greater value on the home space, this isn’t the only reason that Canadians are investing in home renovations. Many are also looking to make home improvements as a means to increase their property values. More and more Canadians are investing in real estate due to the current affordability of the market, and many see home renovations as a great way to increase the value of their homes while real estate is cheaper. With a home upgrade, property owners are sure to see greater profits in the future, making home renovations more valuable than ever before. If you’re considering getting into the home renovation business, the time has never been better to begin your training!
Looking for the right home renovation school?
North American Trade Schools has the program for you!
Considering Electrician Training? 5 Benefits of Being Your Own Boss
June 08, 2021
After completing their training and gaining a few years of experience, many electricians choose to open their own business. While starting your own business comes with its own set of challenges and hard work, there’s a reason that so many electricians choose to take on this endeavour. Opening your own electrician business can be extremely rewarding, and nothing beats being your own boss.
If you’re considering whether it’s worth it to start your own electrician business, read on to discover five benefits of this exciting venture.
1. If You Start Your Own Business After Electrician School, You’ll Have More Independence
While working for another contractor can offer stability, owning your own electrician business offers an appealing level of freedom. You can choose what jobs you take, and you’ll be in charge of making your own decisions about a project based on your personal assessment. When you open your own business after electrician training, you’ll also be able to decide which services to specialize in. Not only does this level of independence offer you more freedom throughout your career, it also allows you to define your approach to business on your own terms.

2. When You’re Your Own Boss, You Have More Flexibility
It’s often difficult to find a work-life balance throughout your career. For many electricians employed by a company, their schedule is dictated by the demands of their superiors, giving them less flexibility in their day-to-day lives. Opening your own electrician business allows you to make your own schedule, giving you the opportunity to take time off when you need it and leading to more flexibility. Only want to work four days a week? Starting your own electrician business gives you the option to structure a schedule that allows for it.
3. You’ll Potentially Have the Opportunity to Earn More
While most electricians can’t complain about their salary, there are limits to what an electrician can make by doing contracted work. If you decide to start your own business after electrician school, you’ll be able to enhance your own success by setting your own prices. As your business grows, you’ll see the financial rewards increase too.

4. You Have the Freedom to Innovate
After gaining some experience as an electrician, it’s likely that you’ll notice a few processes and procedures which could be improved upon. Although you might not have the opportunity to make beneficial changes to a company’s policies while doing contracted work, opening your own electrician business allows you the freedom to innovate. You can set your business’ goals, develop your own working standards, and create a system that suits you and your clients’ needs.
5. You’ll Be Directly Impacting People’s Lives with Your Business
Everyone requires the services of an electrician at some point in time. There’s nothing better than the feeling of a job well done, and the look on your clients’ faces when they see the results of the work you’ve completed for them. Additionally, you’ll be able to employ other electricians, making a difference in their lives by providing them with a great job.
Ready to enroll in electrician college?
Launch your career with a program at the North American Trade Schools today!

A career in welding requires skilled professionals with an awareness of health and safety practices. Professional welders often work in extreme conditions involving high temperatures, gases and fumes, electrical voltage, and ultraviolet rays. Knowing how to safely operate industry-grade equipment within that environment is an essential skill.
One of the most common tools in welding is an angle grinder. Grinders are used extensively in the preparation of work to cut, grind, blend, buff, and clean metals. While grinders are a common feature of welding, they still carry a number of safety hazards. That’s why it is important that those in the industry learn how to properly use a grinder in order to minimize the associated risks. If you’re considering joining the welding profession, keep in mind these safety tips when working with a grinder.
Make Sure to Choose the Right Wheel
First and foremost, you need to ensure you have selected the right wheel for the material and application. For example, a grinding wheel should never be used to cut, and a cut-off wheel should never be used to grind. Likewise, using the wrong grinder for your chosen material can cause damage to the wheel. If you were to use a wheel meant for steel on aluminum, the wheel could become clogged and break down during the process. Professionals with welding technician training will be able to identify the designated uses of different grinding wheels.

It’s also important to pay attention to the revolutions per minute (RPM) of a wheel to ensure you don’t exceed the maximum RPM recommended by the manufacturer. While a wheel may fit on a grinder, it doesn’t mean it’s intended for that grinder. You never want to use a wheel on a grinder with a different RPM rating. It’s a good idea to check the label on both the wheel and the grinder before assembling the two parts.
Always Use a Wheel Guard
As a professional welder, you’ll likely use a grinder in a variety of ways and over a prolonged period of time. Naturally, grinders are subject to cracks and damages with extensive usage. It’s important to ensure that a grinder is in good condition before using it, and to properly install the wheel guard.
Wheel guards are used for deflecting sparks and debris away from the operator, and to protect users in the instance that the wheel guard detaches. Grinding wheels are at risk of cracking or breaking, and if this happens, pieces of shrapnel can be sent flying. For that reason, it’s essential to use the proper wheel guard in the correct position at all times. Most guards provide 180-degree coverage, and can easily be adjusted so that the exposed part of the wheel is positioned away from you.

Take Care of Your Space After Welding Technician Training
Students in welding classes can expect to take courses in health and safety, where they learn to create a safe work environment and to minimize general hazards in welding. When using an industry grinder, it’s important to take measures to protect your face and body from harmful materials.
Before starting their work, professionals should wear all of their Personal Protective Equipment (PPE), including safety glasses, a helmet, ear protection, gloves, and aprons. These will protect operators from abrasive particles. It’s important not to wear loose-fitting clothes or jewelry while grinding, and to keep hair away from moving parts.
By preparing yourself for the workplace and remaining mindful of your surroundings, you will be able to perform your job safely, efficiently, and effectively.
Are you interested in welding college?
Contact NATS to learn more about our program!
4 Home Exterior Inspection Tips For Students in Home Inspector Training
May 25, 2021
The exterior of a house can tell you a lot about what to expect from the house itself. If you’re considering a career as a home inspector, it will be your job to assess the condition of the exterior to ensure that the home is suitable for buyers to move into. With a trained eye, you’ll be examining the exterior components for any potential problems or deficiencies–relating your findings to the buyers.
When inspecting a home’s exterior, there are a few potential problems to look out for. Whether it’s a crack in the foundation or a few misplaced shingles on the roof, these seemingly small defects can create bigger issues for buyers down the road.
Read on to discover four exterior home inspection tips that will help you to determine whether a house is acceptable for future buyers.
1. During Your Home Inspector Career, Pay Attention to How Water Is Managed
If water isn’t being routed properly throughout a home’s exterior, this can create big problems in the future. When water is in places where it shouldn’t be, it can cause mold, rotting wood, foundation damage, and other issues. To ensure that a home isn’t vulnerable to water damage, it’s important to carefully inspect the gutters and downspouts of a home during your home inspector career. The gutters should be clear instead of clogged, and the downspouts should be routing water into the storm system plumbing instead of near the foundation of a home. Additionally, check the gutter and downspout mountings to make sure that they’re secure.

2. Always Carefully Examine the Roof
The roof of a home is essential in maintaining the condition of the interior. Roof problems are important to address before buyers move into a home, as they can be expensive to repair. As a home inspector, you’ll want to know how old the roof is, which can give you some context when it comes to the inspection process. To determine whether a roof is in good shape, make sure to climb up to the roof for closer examination. Check to see that the shingles are not loose, misaligned, or missing. Additionally, check all seals to ensure that water cannot leak into the interior. If the roof is in bad shape, this could be a potential problem for buyers.
3. Look Out for Rotting Wood and Other Siding and Trim Issues
The siding of a home can tell you a lot about how the home’s owners have maintained their property over the years. If you have home inspector training, you can examine the siding and trim of a home for signs of wear and tear in a few ways. First, examine the exterior paint for areas of damage. Spotty or missing paint can indicate the condition of the wood beneath it, which could be rotting. Additionally, search the siding and trim for signs of insect or rodent damage. If the siding or trim contains holes or cracks, this could be a sign that it needs replacing.

4. Is the Foundation Cracking? Don’t Forget to Inspect It
The foundation is one of the most important components of a home, as it’s responsible for maintaining the structural integrity of the building itself. As a home inspector, one of the biggest mistakes you can make is forgetting to examine the foundation for signs of stress or cracks. Foundation problems can also manifest in the form of slanted floors or misaligned window and door frames. Check the foundation to ensure that it’s completely stable, as an unstable foundation could result in safety issues for the home’s buyers.
When inspecting a home’s exterior, keeping these tips in mind will help you to make a sound assessment about the condition of a home. Don’t forget to use them throughout your home inspector career!
Ready to become a home inspector?
Get the training you need to launch your career with a program at NATS!
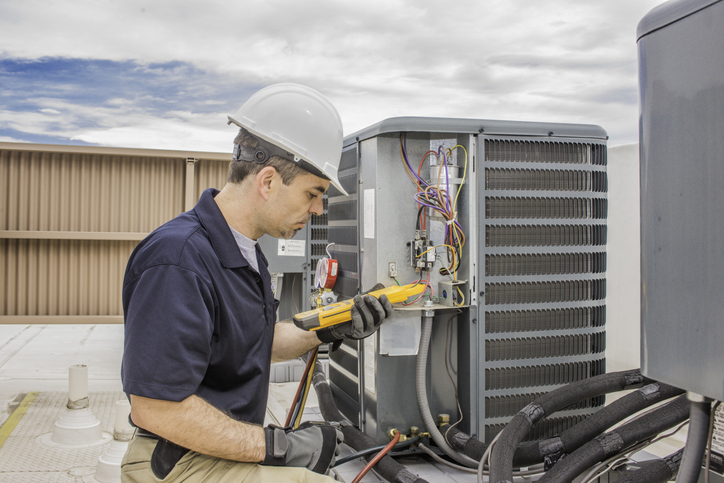
As summer approaches, an air conditioner becomes one of the most essential home appliances. In order to keep cool in hot temperatures, people rely on their AC unit to deliver cold air right into their homes. But what happens when this appliance starts to leak? It’s not uncommon for an air conditioner to develop such a problem over time–especially if it hasn’t been properly maintained or is being used constantly. Air conditioner leakage can occur for a variety of reasons, but the good news is that a leak can almost always be fixed.
If you’re considering a career as an HVAC technician, knowing the most common culprits behind a leak can help you to quickly identify the source of a client’s problem: quickly restoring the flow of cool air within their homes!
Read on to discover six common causes of air conditioner leakage.
1. During Your HVAC Career, Be Aware That a Broken Pump May Cause a Leak
Within an air conditioner unit, the condensation pump is a device that serves to drain water in order to prevent a leak. However, this pump can actually cause a leak if it isn’t working properly. Most pumps are equipped with a float switch, which will turn on when the water gets to a certain level. If this switch has become stuck due to a buildup of debris or scum, it might not work. This lack of functioning can in turn result in dripping water from the unit. If you come across such a situation in your HVAC career, you can try cleaning the switch with bleach. If it still doesn’t turn on, chances are the pump needs replacing.
2. Drain Pan Issues Can Cause Leakage
Located beneath the indoor air handler, the drain pan functions as a trap for condensation created by the air conditioner. It connects to a drain pipe, which transfers the condensate outside to prevent moisture buildup around the unit. If the drain pan is rusting, cracked, or overflowing, this is likely to lead to a leak problem. Check the drain pan for leaks by turning off the AC unit and inspecting the pan for signs of rust, cracks, or debris buildup. If the drain pan is the culprit, this component of the air conditioner can easily be replaced.
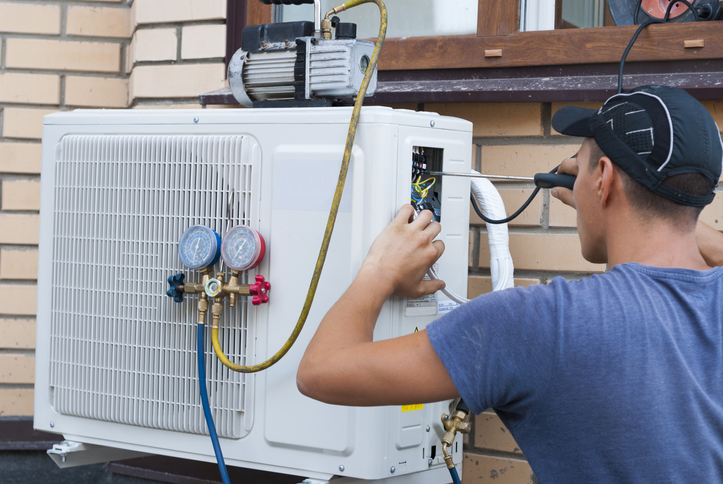
3. If the Evaporator Coils Are Frozen, Leaking Will Follow
Evaporator coils can be found inside the door of the air conditioner unit. Refrigerant flows through these coils to deliver cool air through the vents. But if the evaporator coils freeze, ice will form and create a leak. These coils may freeze due to restricted air flow, a buildup of dirt or debris, blocked vents, or a lack of refrigerant. When you become an HVAC technician, you can identify frozen evaporator coils by checking whether there is ice or frost within the unit. From there, you can determine the source of the problem by checking the refrigerant levels, filter, vents, and other components to ensure that air is moving properly through the coils.
4. An Air Leak is One of the Most Common Problems
When an air leak occurs, air escapes around the vents of the air conditioner rather than through the designated path. This air flow can cause condensation to appear where it shouldn’t, leading to dripping from the AC unit. Air leaks can happen over time if a unit isn’t properly maintained. The good news is they can typically be fixed, simply with caulk, by sealing up the sides of the vent where air is escaping.
5. Look Out for a Blocked Condensation Drain Line
The condensation drain line attaches to the drain pan to transfer condensation outside–preventing leakage from occurring indoors. Over time, the drain line can accumulate debris or be exposed to algae or fungi growth. If the drip pan is overflowing but intact, it’s likely that the source of the leak is a clogged condensation drain line. Luckily, a blockage can typically be fixed by clearing the drain line using vinegar or another solution.
These are just some of the sources of leakage in a home’s AC unit. During your HVAC career, you can refer to these common underlying issues as possible causes when it comes to developing a solution for a client’s leaking air conditioner.
Are you interested in attending HVAC school?
Explore programs with NATS to launch your career today!
In Cabinet Making School? Here are the Best Types of Wood for Kitchen Cabinets
May 11, 2021
Cabinets are an essential and practical feature of any kitchen space. They require a great deal of craftsmanship in order to perfect their structure and design. Cabinetmaking draws upon hundreds of years of woodworking. The job of professionals today is to apply those traditions of the trade with modern tools and technology.
If you’re interested in pursuing a career in cabinetry, you’ll need to have a good understanding of the types of wood most commonly used in the trade and their practical applications. A good cabinet making school will provide hands-on training in woodworking, teaching you how to identify, select, and shape different kinds of wood.
Here is an overview of the best types of wood to use for crafting kitchen cabinets.
Oak is an Option Those in Cabinet Making School Should Know About
Oak is one of the most popular choices for kitchen cabinets, thanks to its classic beauty and durability. If you’re looking for cabinets that will stand the test of time, oak is a great choice. It is an extremely hard and sturdy wood that comes in a variety of shades–from light to dark brown. Students in cabinet making school will find that oak responds well to both hand and machine tools that are used to cut and shape the wood.
When it comes to the aesthetic of kitchen cabinets, oak tends to be associated with older, traditional models. But woodworkers today are applying new finishes to revitalize its use and create more contemporary designs. Although oak is traditionally stained, advancements in wood paint technology are putting an updated spin on the classic grain surface.

Use Maple for Versatility in Design
Maple is another hard wood option, and one of the most versatile in its uses. Much like oak, Maple is readily available and relatively easy to work with–making it a convenient material for cabinetry. With a smooth finish, this wood comes in colours ranging from almost white to cream. Thanks to its fine grain, you can paint, stain, or varnish this wood with high-quality results. Maple is a great choice for those interested in creating a cohesive aesthetic in the kitchen. The colour and texture of this wood allows you to create traditional, contemporary, or modern cabinetry style. They also vary the door form and finish to match the surrounding design elements.

The Timeless Look of Cherry
If you’re dealing in high-end woodworking projects, you’ll appreciate the timeless, classic look of cherry. On the more expensive side, this wood has a rich grain and vibrant colour, which ages over time to a reddish brown once a stain is applied. Cherry is fairly strong and its dark color reduces the visibility of nicks and scratches, making it a solid choice for practical use in kitchen cabinets. Professionals with cabinet making training will appreciate the relative ease of crafting this wood, as it glues well and takes screws and nails easily.
Find Colour Variety in Walnut
Walnut is a hard wood that offers a great deal of variation in terms of grain and colour–ranging from creamy white to dark brown. Although walnut is less readily available than most woods, it is still relatively straightforward to work with, and only needs a light finish to highlight its beautiful natural colour variations. If you choose, a darker finish will create a more classic look. With its colour range, Walnut is a popular choice for kitchen cabinets, and allows for different styles from traditional, to transitional, to contemporary.
Are you interested in cabinet making courses?
Contact NATS today to learn more about our practical program!
