Author: toppyhem
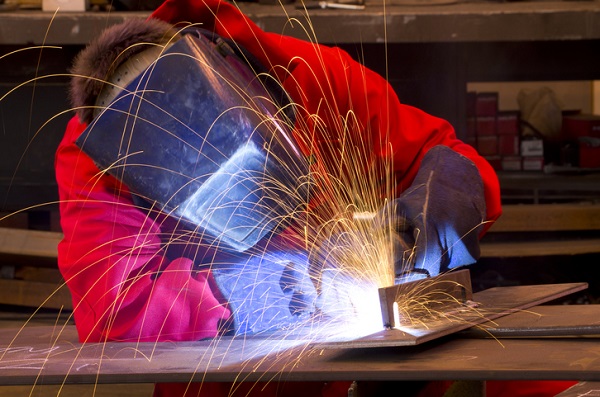
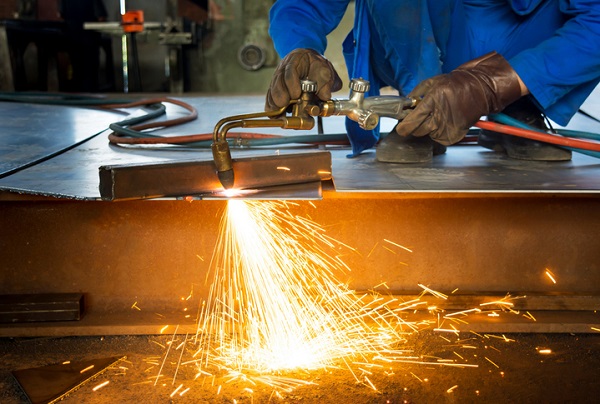
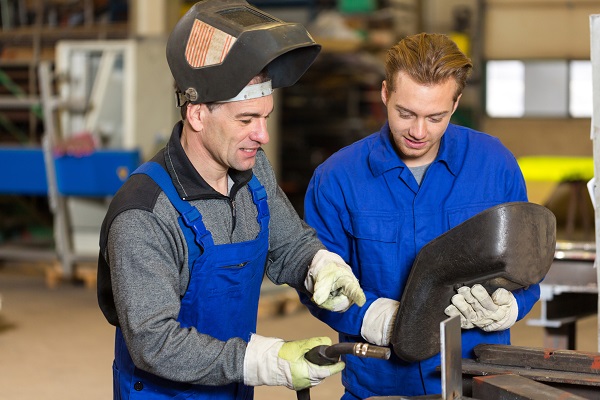
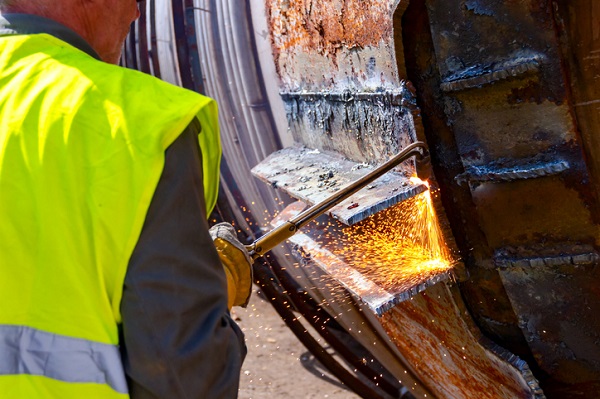
A professional welder is able to master multiple welding techniques specific to different metals and industries. Flux cored arc welding (FCAW) is a variant of arc welding and is often used to join heavy steel plates together.
FCAW differs from other welding processes as it can be done outside with minimal equipment and produces impressive results. It is one of the fastest manual welding processes and can produce more than 25 lbs of welded metal per hour. By comparison, gas metal arc welding (MIG) generates substantially less.
Read on to learn more about FCAW before practicing it for real in the workshop!
Learn How Flux Cored Arc Welding Works at Welder School
Similar to MIG, FCAW involves joining two pieces of metal together using heat. An electrode is continuously fed through a welding gun onto the joint. The electricity short circuits to generate heat, or an ‘electrical arc’, that causes the electrode to melt. This forms a molten puddle that joins the metal together when it cools.
Flux cored differs from other welding processes as the electrode contains a flux compound and shielding gas, which is released when heated. Shielding gas is normally made up of carbon dioxide or argon carbon dioxide, which protects the weld pool from contamination by oxygen or water vapour. This is normally added externally, however, in FCAW it is released automatically in a process called ‘self shielding’. Taking welding classes will teach you even more about these different aspects.
The Difference Between Self Shielding and Dual Shielding
There are multiple versions of FCAW, including self shielding and dual shielding. In self shielding, no external protective gas needs to be applied, as the gas released from the electrode is enough. This means that welding can be performed outside without concerns about windy weather contaminating the heated pool.
By contrast, dual shield welding uses an external shielding gas as well as the inner shield for extra protection. At welding school, students will gain practical hands-on experience performing these processes in the workshop.
The Advantages of Flux Cored Arc Welding
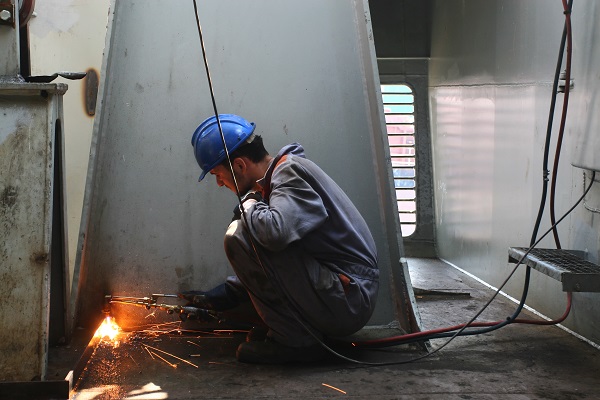
FCAW is a highly productive arc welding method and can weld large volumes of metal in a short time period. The electrode is continuously fed through, meaning that the operator does not need to stop and start to introduce a new electrode. Because of this, it is a common technique for welders working in the construction and maritime industries and who usually work with large, heavy metals.
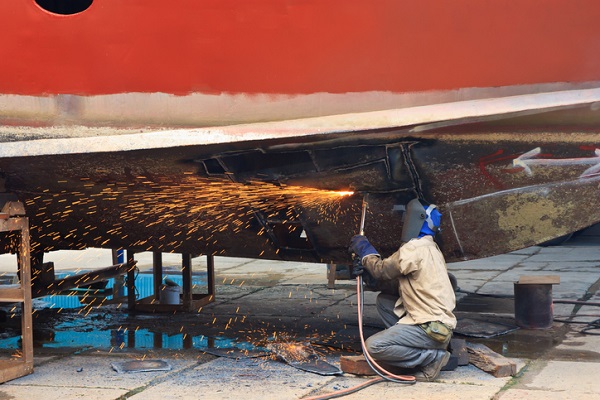
FCAW is one of the only welding processes that can be completed outside. It is less easily contaminated by dirt or rust because of the flux compound, and requires minimal equipment. You do not need a heavy gas bottle, meaning that welders can move around and work outside of a workshop if needed. As well as this, FCAW can be used on mid- and low-alloy steels, stainless steels, and some high nickel alloys.
…and the Disadvantages of Flux Cored Arc Welding
However, there are some disadvantages that come with flux cored arc welding. FCAW produces high levels of noxious smoke, which can make it difficult for the welder to see their work. There is also a risk of the finished metal being porous as gases escape through the metal as it cools.
In addition, the wire and filler in FCAW is more expensive than in other arc welding processes. Lastly, FCAW cannot be used on non-ferrous metal likes aluminium, meaning that it is less flexible than other welding processes out there.
Are you interested in welder school?
Contact North American Trade Schools to find out more!

However, many of the tools and techniques that are still used today are rooted in history. For example, many hand tools are variations of those used in Ancient Greek, Roman and Egyptian traditions.
Read on to discover more about the history of cabinet making and its lasting impact on the trade today.
Earliest Examples of Woodwork and Cabinet Making
By definition, cabinets are furniture used to store things and usually feature doors, drawers and/or shelves. It’s thought that early human civilizations used wooden cabinets to protect food products and fire wood from rain and vermin. Archeologists have found evidence that Neanderthals used stone and bone to work wood over 300,000 years ago – which is probably how the first ever cabinets were made!
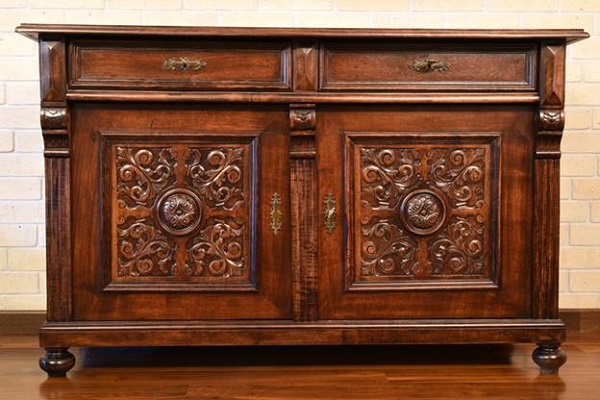
In the Renaissance era, cabinets became more prestigious items, and would be made of precious wood and feature intricate detailing like marquetry. The cabinet was no longer just a simple storage unit – it was a work of art.
André Charles Boulle was one of the most famous cabinet makers of this era, and his work remains on display at museums and galleries across Europe. It’s well worth seeking these pieces out at some point in your cabinet making training if you want to see the work of a true master of the craft.
Around this time, cabinets were used to store paper and valuable possessions. Cabinet makers started to introduce writing areas, which led to the invention of bureaus and desks with cabinets.
Cabinets were made larger and larger, and were often the most dominant piece of furniture in a room. All of this combined meant that cabinet makers were one of the most highly regarded woodworkers.
The Industrial Revolution and Introduction of Power Tools Used in Cabinet Making Training
The industrial revolution in the 18th century impacted almost all trades. Electricity was then invented in the mid-19th century, and these two factors changed the cabinet making trade forever.

The industrial revolution changed the cabinet making industry forever
The circular saw was invented at the end of the 18th century, and meant that cabinet makers and carpenters could cut wood much faster. And in 1895, the first ever electric hand drill was invented. Variations of both of these inventions are still used in cabinet making courses today.
Cabinet Making Post-World War 2
In the 1950s, cabinet making became a popular hobby. People would spend time designing and building their own bespoke cabinets.
For professional cabinet makers in the 1950s, technical advances were continuing to transform the trade. The invention of numerical control machines meant that cabinet makers could now ensure that they were cutting all wood the same length and dimension without having to spend time measuring and double-checking.
The Cabinet Maker Today
Nowadays, cabinet makers need to know how to cut, shape, and join wood, and they need to be familiar using hand and power tools. Cabinets themselves have also changed. A cabinet is no longer the centre of the room, but often refers to built-in kitchen and bathroom cabinets.
While the cabinet making trade has changed throughout history, it remains an in-demand profession worldwide, and a very rewarding one.
Are you interested in cabinet making courses?
Contact North American Trade Schools to find out more!
4 Things Electrician School Students Should Know About Roughing In Electrical Wiring
February 04, 2020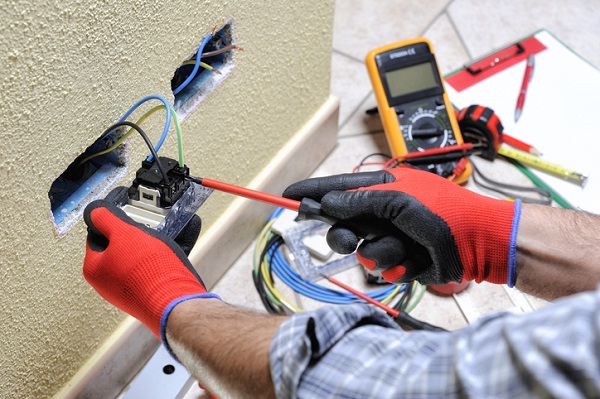
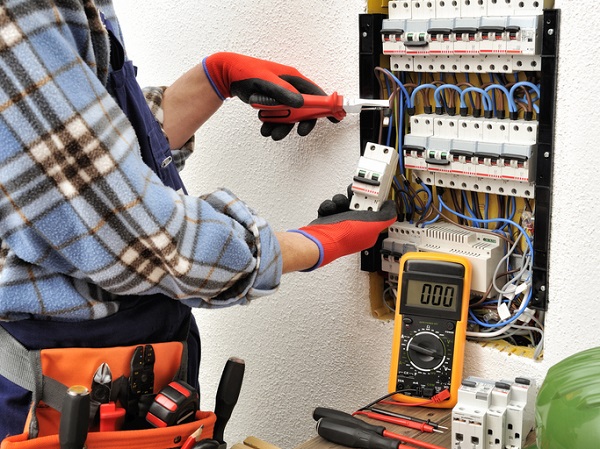
If you want to become an electrician, this is a tool you’ll definitely want under your belt.
Roughing in electrical wiring is something any construction electrician will want to get right, regardless of which part of a house they’re working on. After the framing and initial wiring has been done, you’ll want to make sure the rough-in — the part of the process where the cables are pulled through framing members and studs before going into boxes — is completed before ceilings and walls are closed.
There’s an art to doing it the right way, and any aspiring electrician can do well to keep a few tips in mind. Here are some tips for getting roughing in electrical wiring right if you’re studying to become an electrician.
Before Pulling Wires, Be Sure to Straighten Them Out
Straightening out wires will make the process of pulling cables through holes much easier. To do this, straighten the cable between your forefinger and thumb while you’re walking along its length.
After pulling it through the holes, push it back so that there’s still some slack, just in case the cable gets cut too short and more length is necessary. Also, make sure cable protection plates are installed before pulling anything, and that they are drilled close to the edge of a stud. They will need to be set back at least 1 to 1 ¼ inches away from the edge of a wood-framing part.

Picking the Right Electrical Box Will Go a Long Way
During your electrician career in construction, you will have a choice of electrical boxes to use for different projects.The most common ones are made of fiberglass or plastic.
Depending on the size of the wire gauge, they can be used for large appliances, living spaces, bathrooms or kitchens. Plastic boxes are typically less expensive than fiberglass models, although they aren’t as tough.
Be sure to pick a box with a minimum volume of 20 cubic inches. Larger boxes will make the wiring process easier, so you should pick one large in size that is made with the right materials for the project.
If you’re working on a ceiling fan, you’ll need a special type of electrical box attached with a brace, so that it can make the fan more stable and absorb its vibrations.
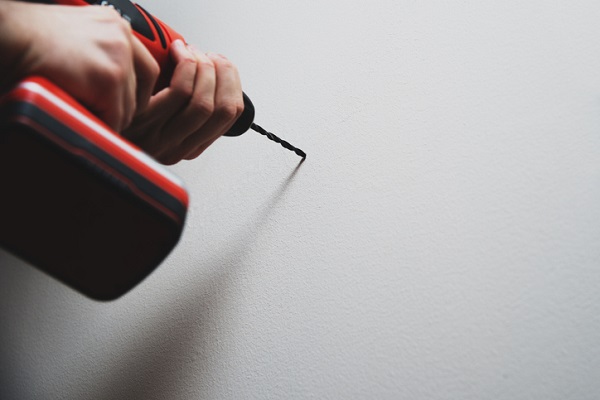
Make Sure All Holes are Well-Aligned and Straight When Drilling
You’ll want to be sure that holes are straight and symmetrical in height, so that pulling cables is as easy as possible. If they are pulled at varying heights or angles, it can cause cables to snag on sharper edges.
Once ¾ inch holes are pierced into the framing members above the boxes, centre the part on the stud before bracing the drill. Use your thigh to put pressure on it to make drilling the studs easier.
Ensure the holes are consistently kept at the same height, so that you can more easily fish cable through. You’ll be able to pull cables and drill holes once all boxes are nailed correctly.
After Electrician School, Don’t Over-Bend Any Cables
While bending cables, make sure they are not bent at more than a radius of 2½ inches. You can avoid over-bending them if you drill holes at a range of 8 to 12 inches above or below boxes, so that the cable can go upwards or downwards into them.
This is important for students at electrician school to remember, because the conductors and sheathing can be weakened if the cable is bent incorrectly or too sharply, resulting in a fire hazard.
In any case, it’s important to remember that you’ll need to be as gentle as possible when wiring, to avoid damaging the conductors, as they will carry the electricity. Conductors are also vulnerable to stress and fatigue from overbending, or bends that are too sharp.
Want to get your electrician diploma?
Contact North American Trade Schools for more information!
Acetylene torches are to HVAC (heating, ventilation, and air conditioning) technicians what calculators are to mathematicians: an essential tool with many uses. Providing one of the most powerful methods of welding and cutting metals, this tool is widely used in the industry to fix leaks and solder line sets.
But like any gas-powered tool, if you want to use it properly, there are a few key things you’ll need to know and some safety regulations you’ll need to follow. Read on to learn all about acetylene torches and the role they will play in your HVAC career.
What is Acetylene & How Can You Use it?
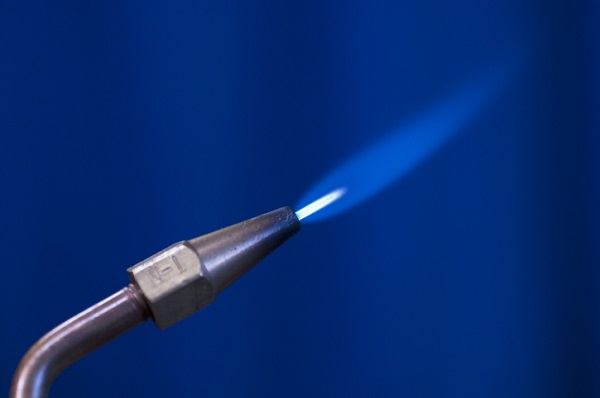
As one would expect, the basis of an acetylene torch is the hydrocarbon compound called Acetylene. What you may not know is that this element can get really, really hot. In fact, acetylene produces the third hottest chemical flame, and can reach an astounding 3,300 degrees Celsius when mixed with oxygen.
Acetylene is a highly unstable compound. However, once you combine it with another chemical, you can use acetylene safely and easily while still benefiting from its thermal capabilities. Oxygen is the substance most commonly combined with acetylene – but it’s important to note that the term “acetylene torch” can also be used to describe any type of oxy-fuel torch where other gases such as propane and propylene are used.
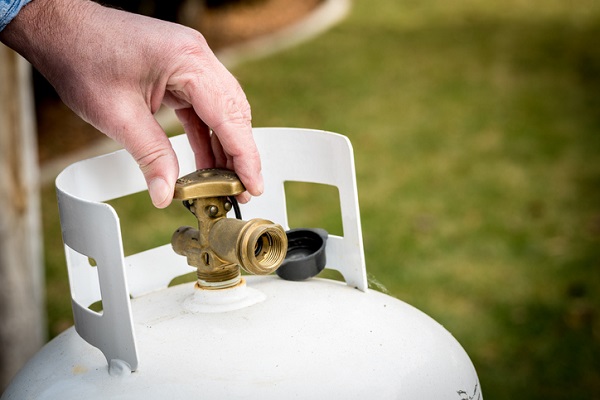
Regardless of which chemicals are involved, the two gases are present in two separate gas tanks, which are connected to the torch by two metal hoses. The flame is produced when these two gases are passed through the hoses and combined. When this flame contacts metal, it produces a chemical reaction that initiates a process known as oxyfuel cutting.
Acetylene Torch Safety Regulations
As with any power tool, it’s important to know how to safely handle an acetylene torch before you put it to use. One advantage of HVAC school is learning the safest ways to handle the equipment you’ll encounter in your career. Graduates of North American Trade Schools will learn the safety regulations and precautions they need to take to operate an acetylene torch.

One procedure you will need to learn is how to check your acetylene torch before using it to make sure it’s functioning properly. Firstly, you should check that the torch is closed, and ensure that the pressure adjustment screws are blacked out. Then you can separately open the gas cylinder valves and adjust the regulator p/a screws to change the pressure settings. Next, you can open and close valves separately and make any other changes to the pressure settings on the regulators.
HVAC Technician Training 101: Using an Acetylene Torch
HVAC technician training will allow you to learn how to use these power tools through a hands-on approach, but it’s good practice to know a bit about the steps in using them before you begin your studies.
To use an acetylene torch, you’ll first have to light it by purging the oxygen and fuel gas lines – separately – and opening the fuel gas valve slightly. Next, using a striker, ignite the flame. You can then adjust the gas flow to make the flame form a sharp tip. Now your acetylene torch is ready to use.
Once you’re finished with the torch, you can shut it down by closing the oxygen and fuel gas torch valves. If you don’t plan on using the torch for a while, make sure that all the regulator gauges read zero.
Want to earn your HVAC diploma?
Contact North American Trade Schools for more information!
4 Tips for First-Year Apprentices Working Towards Electrician Certification
January 22, 2020
After you complete a pre-apprenticeship program you can seek out an electrician apprenticeship, where you get paid while learning on the job. In Ontario it can take up to five years to complete an apprenticeship during which you will learn the tools of the trade from professionals. An apprenticeship also includes some more time in the classroom and is a necessary step to becoming a licensed electrician.
Before you start your apprenticeship, you may have an idea of what it will be like, but there are a few points that may help you adjust to on-the-job training. Also, depending on which province you apprentice in, there might be loans to buy tools as you start and grants to support you during your classroom hours. In the meantime, here are a few tips to help you during your first year as an apprentice.
1. Ask Questions
While it is true that you are doing a job and you are getting paid, an apprenticeship is still training and it is a great time to ask questions. Professionals know that you are learning to become a maintenance electrician and should be prepared to explain tools and procedures to you. This may be as simple as asking “what’s next?” and “why?” Electricians have experiential and sometimes highly specialized knowledge that goes beyond the classroom. This is why they may have special insight and it is worth asking for as much information as you can get.
2. Record Your Hours
When you are on your way to electrician certification it will be necessary to record your hours and ensure that they are counted toward the completion of your apprenticeship. The same way you will have to keep up to date with electrical codes and regulations as an electrician, you should stay up to date on your progress as an apprentice. Not only is this necessary, it also helps you keep track of how much you’ve learned.

3. Stay Healthy
You will get a sense of the physical demands in the first year of your apprenticeship and many electricians say it is important to stay in good shape. Electrician work can involve a lot of movement, stretching and lifting. You will be able to work longer and better in your career if you are healthy. The first year of your apprenticeship is a great time to work exercise into your routine, and make sure you are having nutritious meals.
4. If You Want to Become a Maintenance Electrician, Take Your Work Seriously
Electricians are highly respected skilled trades people and play an important role in construction and maintenance. When you begin your apprenticeship, remember that you have a big responsibility. It is important to do basic things like show up on time for jobs, but it is also important to remember that you are responsible for maintaining safety standards in whatever setting you work. The more seriously you take your work during the first year, the more you’ll develop good habits in your career that can help you land additional work in the future.
Want to know more about maintenance electrician training?
Visit North American Trade Schools today!
The beginning of a new year, particularly a new decade, is the perfect time to consider starting a new career. If you’re a practical person looking for a challenging but rewarding trade which offers high pay and the opportunity to work in various countries and industries, welding could be the industry for you.
Welders make and put together metal parts using heat. They are most commonly employed in the oil, gas and mining industries, but also work in the automotive, marine and military sectors.
Skilled welders are always in demand, and this demand is expected to increase this year thanks to retirement numbers and developments in energy and manufacturing.
Read on to find out why now is the perfect time to enrol in welding training.
Welders Are Always in Demand
Figures show that this year Canada could face a ‘baby boomer retirement’ crisis, as ‘baby boomers’ (those born between 1946 – 1964) retire in huge numbers. This is good news for those starting a new career in a trade like welding, as there will be plenty of job opportunities. The Canadian Government estimates that may be as many as 24,000 new job openings across the country between 2017 and 2026.
As well as this, there is lots of development happening in the energy sector right now which will create demand for welders. The nation is looking to invest in better sources of renewable energy, as well as continuing to build infrastructure for current sources like wind turbines and solar panels. These are often made using metal, meaning that welders will be needed.

Skilled welders with specialized experience in Gas Metal Arc Welding (GMAW), Gas Tungsten Arc Welding (GTAW), Flux Cored Arc Welding (FCAW), and Shielded Metal Arc Welding (SMAW) are among the most in-demand.
As part of your welding technician training at North American Trade School, you will gain practical experience in each of these techniques, putting you in an excellent position to find employment after graduating.
Work in a Variety of Industries with Welding Technician Training
Studying to become a welder can lead to a career in a wide variety of industries. Welders are needed in almost every area of manufacturing, construction, energy, and repair and maintenance, and are also able to switch between industries throughout their careers.
Welders can choose to work in factories, on ships or shipyards, as part of the military repairing military tanks and vehicles, as well as in the engineering, oil, gas and mining industries.
As well as this, there is always the opportunity to take your career a step further with extra studying, which could open up opportunities in robotics or education.
The Opportunity to Travel the World
If you’re looking for a career that will take you all over the world, then look no further. Demand for welders is increasing internationally, not just in Canada.
You can also work in interesting and unusual environments. A welder working on board a cruise ship, for example, would be able to visit multiple countries while working, and would also benefit from high pay, as well as free room and board.
Additionally, some welding jobs structure their contracts to allow you a lot of time off, such as roles where you work on the road for six months and then have six months off.
Earn a Competitive Salary
Welder salaries vary depending on skill, experience and location. Highly skilled welders that are prepared to travel can earn well over six figures. Welders working with the military in the Middle East can also expect to receive high pay because of the risk involved.
Are you interested in taking the next step in your career with welding training?
Contact North American Trade School to find out more!
Key words: welding training, welding technician training, become a welder
What Students in Home Renovation School Should Know About Spray Booth Painting
December 31, 2019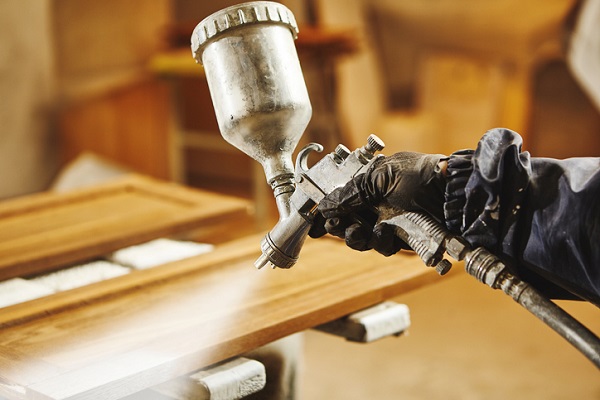
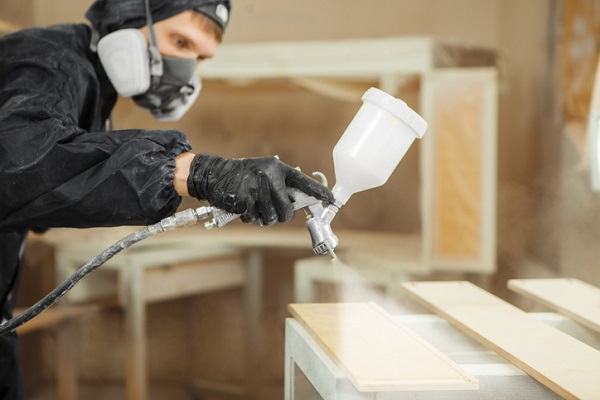
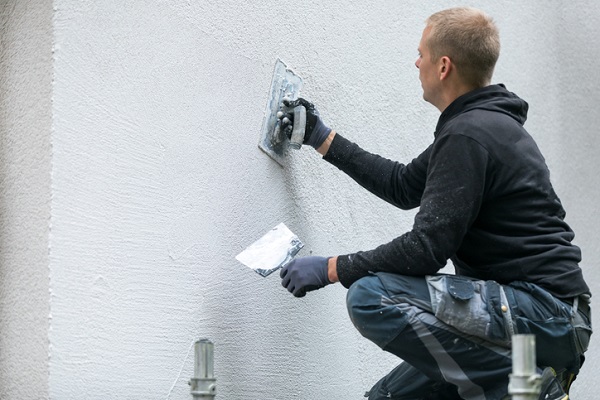
Spray booths are widely used in the automotive industry for painting cars. They’re also very useful in home renovation, when working on paint jobs that need to have a smooth, flawless finish. These booths aren’t just for classic spray jobs—you can also use a paint booth to apply lacquer or glaze, or for shading and faux finishing.
When you are working in clients’ homes, you want to work as neatly and cleanly as possible. Dust, debris and spills are undesirable when people have you in their houses, as you want to make your presence as easy as possible for them to live around. This cleanliness also applies to surfaces you are painting. Read on for more about why you should know about these handy booths if you’re going to work in home renovation!
Isolating Paint Jobs After Home Renovation School
When you are working on a paint job such as a door or trim, you don’t want any of the dust and dirt from working on other parts of the home to stick to the paint. This can create an uneven, gritty surface and take away from the smooth, professional finish you want. A booth allows you to separate the paint job from the surrounding environment, so that particles can’t blow onto the project and settle.
If you’re in home renovation school you might be looking to pursue a career in the field, or you may be most excited about doing your own home projects with a professional level of skill. If you’re working on your own home, you surely want to do the best job you can when reviving the space. Keeping clean can make the difference between a very DIY look and the stuff of pros.
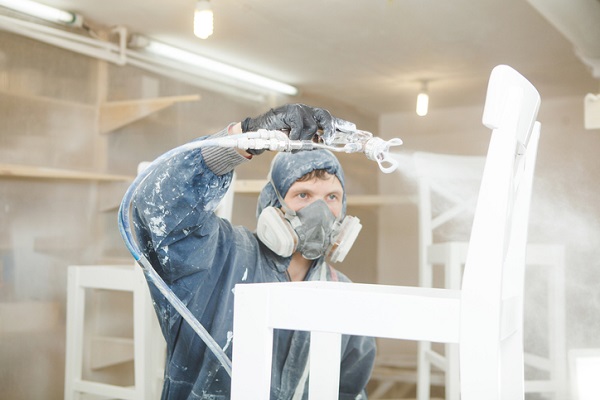
Students in Home Renovation School Should Know How Airflow Works
The flow of air in a spray paint booth affects the quality of the paint jobs done inside of it. Air runs into a paint booth through a filter, so that the space is not contaminated by debris or dust from other work on the site. It then flows out through an exhaust area and rids the space of flammable fumes. This allows for the job to continue safely without any issues with regards to safety.
The ventilation in a booth prevents spray from escaping into the exterior of the booth. It also makes jobs more efficient—overspray, or suspended particles settling and painting areas that aren’t meant to be painted, is a concern during jobs. Well-ventilated paint booths will carry the overspray away from the cupboard door or tiles you are painting and not allow it to land on top of the project.
Why Lighting Matters in Spray Paint Booths
If you’re in home renovation technician school, you probably already know the importance of lighting projects well so that you can see your work. When you are working in a booth, you will require lighting that doesn’t cast shadows over the job, so that you can judge evenness and quality of the surface. You may also need to match colours while you paint, in which case light should adequately allow you to do this.
For painting, you need to be able to clearly see the wet edge on the item, so lighting has to show the surface of the project where the coating makes contact with it.
Are you looking for home renovation technician training?
Contact North American Trade Schools for more information.
Finishing Welding Classes? Here’s How You Can Land Your Dream Apprenticeship
December 24, 2019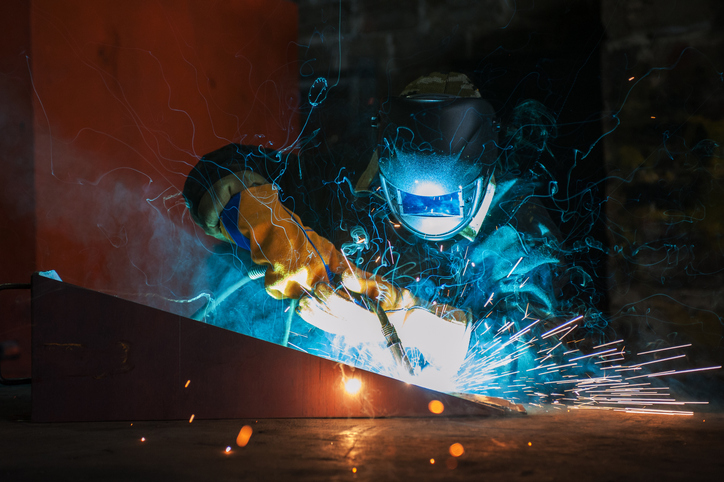
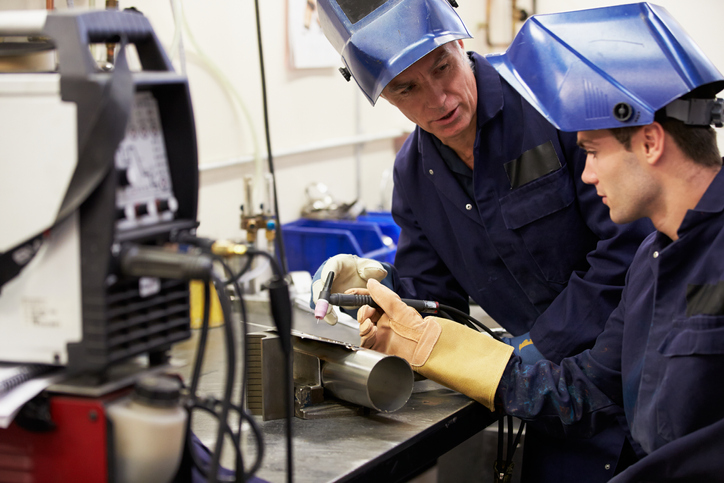
Welding can be a challenging job, but also a rewarding one. Getting an apprenticeship is what helps students on their way from the classroom to a welding career, and gives them the knowledge necessary to move up to journeyman status. Students who love working in hands-on environments can thrive in this type of career, and there are several ways in which they can get the kind of training they want.
Although getting welding training at an educational institution is an essential step in the process, what you do after your schooling is even more important than what you do during it, and getting the best possible apprenticeship can help build a foundation for anyone wanting to work in a skilled trade such as welding. Here are some tips for you to land your dream welding apprenticeship.
Get the Right Welding Training, Both in and Out of the Classroom
Finding the right apprenticeship opportunity can begin with the right training program. In Canada, apprenticeship programs vary between provinces, but they often require classroom time during a span of six to eight weeks per year, as well as paid, on-site training between two and five years. For welding specifically, the combination of classroom time and on-the-job training amounts to about 6,000 hours, or around three years.
Whilst in school, students can learn various aspects of the trade through their welding courses. For example, the Structure & Pressure Vessel Welder diploma program at North American Trade Schools can teach welding students about concepts such as positional welding, blueprint reading, electrodes, consumables, and various welding processes.
How On-Site Training Can Give Students the Tools They Need for Success
Anyone hoping to have a career in welding in Ontario must become a member of the Ontario College of Trades, and must remain part of the College throughout their apprenticeship. As an apprentice on the job, students will be given instruction from a skilled worker, and the apprentice’s sponsor is tasked with signing the parts of the training standard demonstrating that the apprentice has met all necessary training requirements.
Apprenticeships can also pave the way for students to get good-paying jobs after their training. Apprentices get paid in the meantime so they can earn and learn at the same time. 90 per cent of the training for an apprenticeship takes place on the job, and the student will need to find a sponsor who can help provide them with the necessary training.

What a Student Needs to Do to Get the Most Out of Their Apprenticeship
Students should research various welding training programs, and call the schools to get more information on what each offers. Similarly, they can reach out to businesses offering apprenticeships or other welders to get tips and insights on how to get the apprenticeship they want after their welding courses. Since many training facilities are in close contact with companies hiring welders, they can work together to offer the best possible apprenticeship programs to students.
Furthermore, the length of an apprenticeship can be determined by how much prior work experience and classroom education the apprentice has under their belt. NATS’ welding diploma program also teaches students about searching for jobs, crafting resumes, and what they can expect during an interview for a job in welding to help them land an apprenticeship.
Want to attend welding classes?
Contact North American Trade Schools for more information!
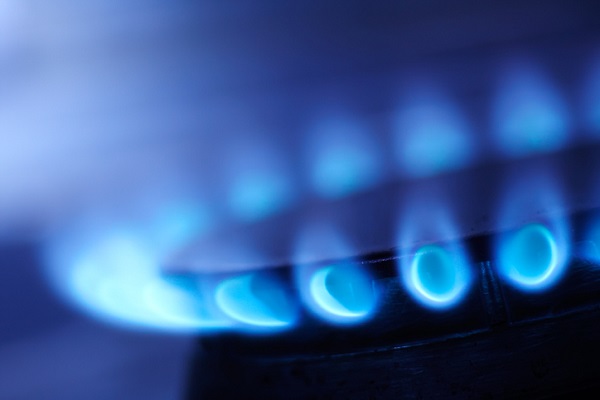
Fuel gases help fuel heating systems, provide energy for transportation, and are used for welding—but what are they, really? Fuel gases are gases that, when mixed with oxygen or air, become combustible. They can apply to several different processes, and can be used for a number of different industrial applications. Since it’s very important for students training to become an HVAC technician to know how to practice the safest possible gas-handling procedures, learning the basics about fuel gases is a good idea.
While there’s a lot to learn about fuel gases, it’s worth knowing some of the basics beforehand, so that students have a solid idea of how fuel gases apply to heating. Here’s what students in HVAC training should know.
HVAC School Students Should Familiarize Themselves With the Different Types Used
One of the most important things to remember about fuel gases is that there are a number of different types that can be used. Some of the most commonly used are hydrogen, carbon monoxide, and ethylene. However, we’ll be focusing specifically on acetylene, methane, propane, and propylene. These four in particular are worth remembering for those in HVAC training, because each of them are comprised of hydrocarbons, either partially or in full.
Acetylene is considered the most efficient and productive fuel gas, producing the hottest and most concentrated flame. It can also be used for both welding and cutting, the only kind of commercial fuel gas that can do so. Methane is what natural gas is primarily made of, and is most often used for heating. Its combustion properties can also vary, and can be used for cutting purposes in some cases.
Propane has a lower flame temperature than acetylene when mixed with oxygen, and has the lowest flammability range among the most common fuel gases, but can be used for various purposes such as heating, brazing, melting and drying. Lastly, propylene’s double bond means it burns hotter and has a higher flame temperature than propane, and is often used during situations that call for a higher process performance.
Different Fuel Gases Have Different Heating Values and Other Properties Between Them
Since a big part of HVAC school involves learning about fuel gases and their respective characteristics and properties, it’s worth familiarizing yourself with the different heat values between each type of fuel gas. For example, acetylene has a gross heating value of 1,498 btu/ft3 and 21,569 btu/lb (British thermal units per cubic feet and pounds). Meanwhile, propane has a gross heating value of 2,572 btu/ft3 and 21,564 btu/lb, and propylene has 2,336 btu/ft3 and 21,042 btu/lb. Therefore, acetylene needs much less than propane or propylene to produce the necessary heat.
It’s also worth remembering that fuel gases each have different carbon to hydrogen atom ratios. This means that the efficient burning of the gas will require various amounts of oxygen to be used depending on the fuel gas type. Furthermore, some fuel gases are natural, while others are manufactured. Natural fuel gas largely consists of methane, while gases like ethane, propane and butane are considered natural gases. Natural gas is also considered the most commonly used fuel gas type today. Meanwhile, manufactured types of fuel gases include hydrogen, acetylene, biogas, coal gas, and blast furnace gas among others.
Want to start your HVAC technician training?
Contact North American Trade Schools for more information!
Exterior Wall Components for Electrician Training and Beyond
December 13, 2019
When you study construction maintenance for electricians, you will have the opportunity to apply what you learn in the classroom to hands-on training. This will include working on skill sets for commercial, industrial and residential electricity, analyzing and preparing machine controls, and building an exterior wall, among other things.
Exterior building walls, on first glance, may just appear to be what you see from the outside. When you look at a building you may see materials like brick, cement, siding, or shingles. However, the construction of an exterior wall that is fit for its environment is a complex process that requires a lot of attention to detail and design. Here are a few important points about exterior wall components.
A Brief Introduction to Components for Electrician Training
During your electrician training it will become clear that understanding a building layout and how walls are constructed is important for maintaining electrical systems. The exterior wall assembly in particular helps protect the interior of a building from outside elements. This not only refers to providing shelter for people, but also keeping systems within the building running properly.
Here is a quick introduction to the components of exterior wall assembly:
- Exterior cladding: this layer is chosen based on environmental conditions as well as aesthetics. It is the first, but not most important, defence against weather.
- Air barrier, also known as air paper or house wrap: this is a weather resistant layer that allows moisture to escape.
- Vapour control layer: moisture can build up in the exterior wall assembly without this component so it is typically required by building codes and regulations.
- Insulation: this supports interior temperature control.
- Structural element: this is the load bearing component (or components) that distributes weight and pressure to the structural frame of a building.

Interface Conditions
After you are introduced to the functions of each component of an exterior wall assembly it is important to understand how each component affects the whole. Essentially, the assembly must be able to control and mitigate moisture and protect the interior, including its electrical systems. The ways in which the components of the wall assembly are separated, joined and installed, are referred to as the interface conditions. For example, elements like flashing and end dams prevent excess rain from entering the dry zone of the assembly and may be necessary around windows, or where the wall meets the roof.
Examples of Common Materials
There are many standard materials for exterior wall assemblies that you might be familiar with even before you start maintenance electrician training. For example, Tyvek and Typar are two of the most common polyethylene air barriers. They let water vapour out, but eliminate exterior moisture, thus protecting wiring that may otherwise be vulnerable to moisture. Like tarpaper, another common air barrier, they can be damaged by UV rays.
For the exterior cladding some of the most common materials are cedar shingles, vinyl, cement board, stucco, brick, and a few others. Vinyl or steel siding can be applied directly to air paper. However, if you are using brick or stucco, the interface conditions dictate that a layer of rain screen siding may be required. At the very inside, the most common material is drywall. Overall, your expertise on each of these elements will be required as you work with building plans.
Want to become a maintenance electrician?
Find out how from the North American Trade Schools!
