Author: toppyhem
4 Things for Electrician School Students to Know About Electric Motors
October 15, 2020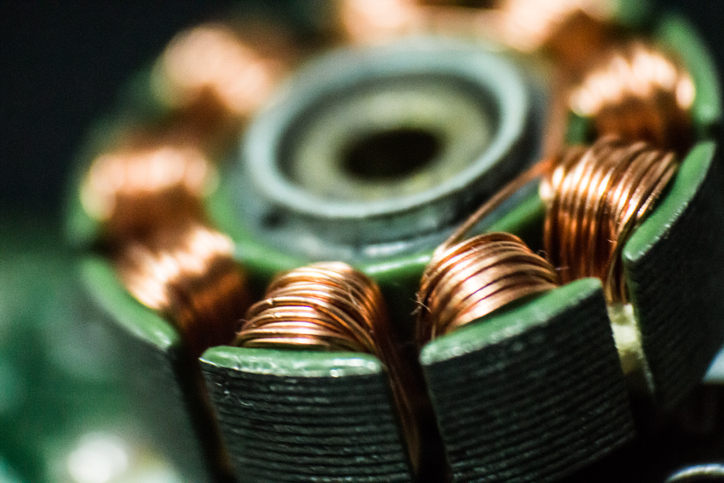
They’re found in appliances and toys throughout your house: remote control cars, electric can openers, computers, washing machines, electric mowers, electric toothbrushes, and much more. In fact, the electric motor might just be one of the most useful electrical inventions since Benjamin Franklin discovered electricity!
Most electric motors have a four-pole permanent magnet motor with double insulation design that runs at 120 volts. They work by adding electricity at one end, which sends a jolt to rotate the metal axle at the other end to power whichever machine the motor lives in.
What else should you know about these incredibly useful and common motors? Here are four things to keep in mind about their design and functioning.
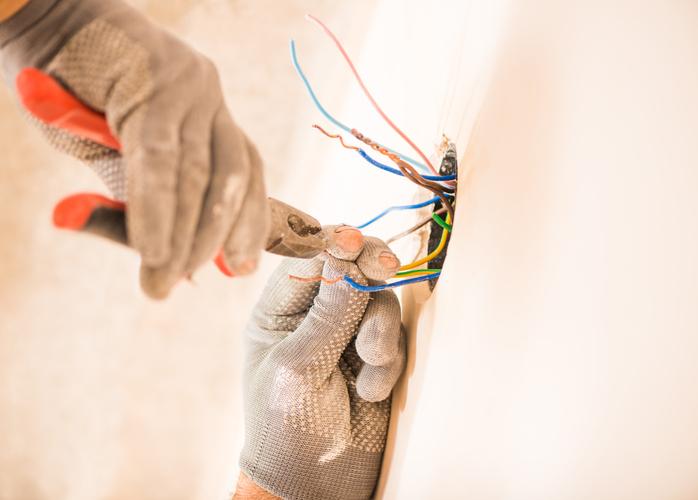
1. They Work Using Electromagnetism
Those attending electrician school will learn electrical motor theory. When power is added, what really happens is that current flows through the motor’s coil to generate a magnetic force. One side of this force will flow in the direction the magnetic field is heading in, while a force generated on the other side of the housing will begin flowing the other way. Rotation on the armature thus happens, as an up-and-down action is created.
Most small household appliances like blenders and coffee grinders are run by a universal electric motor. This motor uses an electromagnet to take its energy from the DC or AC power feed, as the motor can be either AC or DC-powered.
2. Dynamic Braking Is Used for Safety
Most electric motors handle safety with the addition of a dynamic braking feature, also known as rheostatic braking. Located inside the circuitry of the motor, handle switch, and wire harness, the dynamic brake is activated upon the handle switch’s release. After the handle switch moves into the off position, the motor is brought to a complete halt.
There are also two other types of electric braking commonly found in the DC motor. Plugging—also called reverse current braking—gives greater braking torque than dynamic braking, and is more commonly used in larger machines such as printing presses and elevators. Regenerative braking is used when there is heavy inertia on the load on the motor, as one would find with an electric train.
3. Improper Maintenance Is the Leading Cause of Malfunction
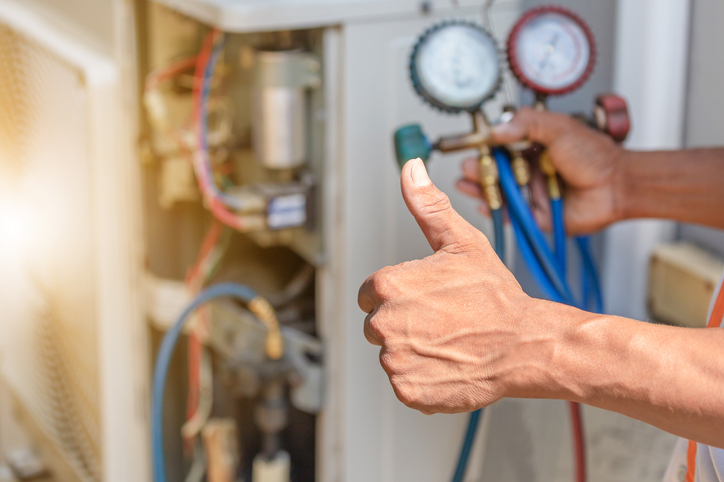
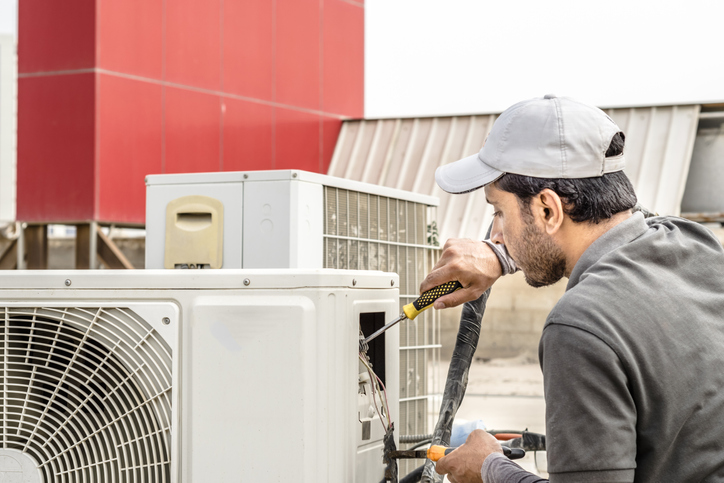
Many electric motors will last longer if given the right level of care. Electric mowers and HVAC units are good examples of things needing regular maintenance, due to their exposure to grass, dirt, dust, and other contaminating elements.
At least once a year, an electric motor that can be contaminated in this way should be inspected and have all of its parts cleaned. This helps to avoid incidences of overheating by removing anything that may be clogging the filter and air cooling system of the machine.

4. Specialized Electrician Training Is Helpful for Attending to Repairs
To diagnose a problem with an electric motor, a technician with electrician training should start by using a digital multimeter to assess the components. Once a problem has been identified, the motor must often be disassembled to proceed with repairs. From there, the parts can be assessed for damage, corrosion, rust, or other contaminants. Brushes will often need to be replaced, along with any damaged parts, but rust and corrosion can usually be cleaned off with a wire brush.

Electric motors are an essential part of modern life, used to power all kinds of machinery in and out of the household. Most of the designs on these kinds of motors are built to last, and will tend to have a good lifespan as long as they are well-maintained. When problems occur, people rely on the specialist knowledge that those trained on electric motor theory can provide.
Interested in learning more about electric motors by receiving professional training at an electrician college?
Contact North American Trade Schools today for more information on our Construction & Maintenance Electrician Pre-Apprenticeship diploma program!
They’re found in appliances and toys throughout your house: remote control cars, electric can openers, computers, washing machines, electric mowers, electric toothbrushes, and much more. In fact, the electric motor might just be one of the most useful electrical inventions since Benjamin Franklin discovered electricity!
Most electric motors have a four-pole permanent magnet motor with double insulation design that runs at 120 volts. They work by adding electricity at one end, which sends a jolt to rotate the metal axle at the other end to power whichever machine the motor lives in.
What else should you know about these incredibly useful and common motors? Here are four things to keep in mind about their design and functioning.
1. They Work Using Electromagnetism
Those attending electrician school will learn electrical motor theory. When power is added, what really happens is that current flows through the motor’s coil to generate a magnetic force. One side of this force will flow in the direction the magnetic field is heading in, while a force generated on the other side of the housing will begin flowing the other way. Rotation on the armature thus happens, as an up-and-down action is created.
Most small household appliances like blenders and coffee grinders are run by a universal electric motor. This motor uses an electromagnet to take its energy from the DC or AC power feed, as the motor can be either AC or DC-powered.
2. Dynamic Braking Is Used for Safety
Most electric motors handle safety with the addition of a dynamic braking feature, also known as rheostatic braking. Located inside the circuitry of the motor, handle switch, and wire harness, the dynamic brake is activated upon the handle switch’s release. After the handle switch moves into the off position, the motor is brought to a complete halt.
There are also two other types of electric braking commonly found in the DC motor. Plugging—also called reverse current braking—gives greater braking torque than dynamic braking, and is more commonly used in larger machines such as printing presses and elevators. Regenerative braking is used when there is heavy inertia on the load on the motor, as one would find with an electric train.
3. Improper Maintenance Is the Leading Cause of Malfunction
Many electric motors will last longer if given the right level of care. Electric mowers and HVAC units are good examples of things needing regular maintenance, due to their exposure to grass, dirt, dust, and other contaminating elements.
At least once a year, an electric motor that can be contaminated in this way should be inspected and have all of its parts cleaned. This helps to avoid incidences of overheating by removing anything that may be clogging the filter and air cooling system of the machine.
4. Specialized Electrician Training Is Helpful for Attending to Repairs
To diagnose a problem with an electric motor, a technician with electrician training should start by using a digital multimeter to assess the components. Once a problem has been identified, the motor must often be disassembled to proceed with repairs. From there, the parts can be assessed for damage, corrosion, rust, or other contaminants. Brushes will often need to be replaced, along with any damaged parts, but rust and corrosion can usually be cleaned off with a wire brush.
Electric motors are an essential part of modern life, used to power all kinds of machinery in and out of the household. Most of the designs on these kinds of motors are built to last, and will tend to have a good lifespan as long as they are well-maintained. When problems occur, people rely on the specialist knowledge that those trained on electric motor theory can provide.
Interested in learning more about electric motors by receiving professional training at an electrician college?
Contact North American Trade Schools today for more information on our Construction & Maintenance Electrician Pre-Apprenticeship diploma program!
 For future HVAC technicians just completing their training, there are many exciting career opportunities available. Graduates can look for jobs as HVAC Installers, Technicians, Maintenance Assistants, or Maintenance Technicians. In Ontario, job opportunities in HVAC are good. Part of the reason for this is that population growth is driving the need for more buildings, especially in certain urban areas.
When interviewing for your first job in HVAC, it’s important to know what employers are looking for and how to present yourself in order to ensure you’re putting your best foot forward. Read on for a few tips on how to ace your interview and land the job.
Know How to Highlight Your HVAC Training in the Interview
When interviewing for an HVAC career, it’s important to research the company you’re applying to, so that you know a bit more about what they could be expecting from you. Try to determine the types of services they provide (whether they’re primarily residential or commercial), what kinds of locations they cater to, and what kinds of equipment they typically utilize. This kind of information will help you to highlight the skills you have that will be most impressive to the employer.
Graduates of hands-on training programs like the North American Trade Schools’ HVAC technician training program can reference the marketable skills they know will impress their potential employer simply by doing a bit of research on the company they’re applying for.

Become Familiar with Possible Questions You Might Be Asked
While you might not be able to anticipate every question, it’s good to come prepared with a few possible interview questions. You’ll probably be asked simple but important questions like what motivates you, what about their company interests you, and other questions which allow them to get to know you as a person. They also might ask you some questions more relevant to the HVAC industry, such as inquiring why you’re interested in HVAC, what your driving record is like, and more. Prepare answers that show you’re ready for an HVAC career and have excelled in your HVAC training.
Prepare Questions to Ask Your Potential Employer
It’s also good to have in mind a list of questions that you would like to ask during the interview. These questions should be about the company specifically, demonstrating that you’ve taken the time to get to know them and showing them that you’re interested. Your questions could be about the company’s expectations for you as an employee, what a typical day on the job might look like, what about the company is especially unique, or any other company-related questions you might have.
A “Thank You” Never Hurts
Lastly, remember to thank the interviewer after you’ve finished, in addition to sending a follow-up thank you email. Make sure they know you’re interested in the job!
Think you have what it takes to become an HVAC technician?
Check out the North American Trade Schools program options today.
 Both MIG and TIG welding are procedures that use electrical arcs to create enough heat for melting down metals into liquids. Both methods use filler material to join metal pieces together, and inert gas is also used to prevent welding electrode corrosion for both procedures. Despite these similarities, these welding types remain quite different in their approach, and with different purposes for their use.
Generally speaking, MIG welding is a good low-cost bet for completing jobs on steel and aluminum quickly, whereas TIG welding is typically reserved for more expensive, high-quality, and precise jobs–requiring more training to master and taking a lot longer to complete.
For a better understanding of which welding type to use and when, let’s take a closer look at both of these processes!
What Is MIG Welding?
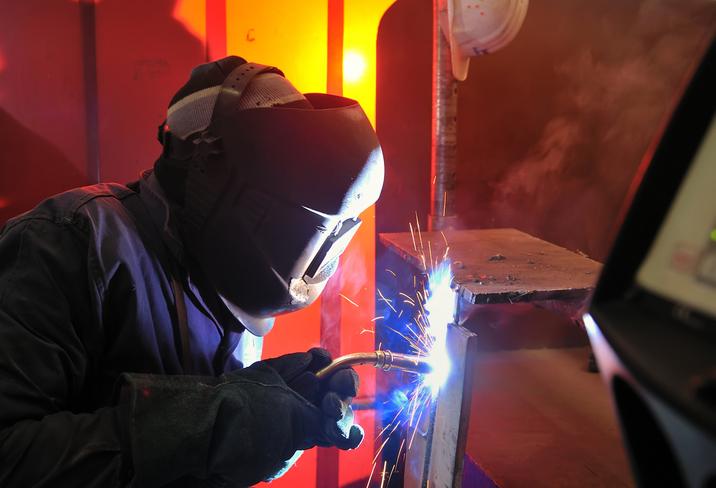
This type of welding is often called ‘point and shoot’ welding due to its similarities to aiming and pulling the trigger on a gun. Metal inert gas (MIG) welding works by feeding metal wire continuously from a spool connected to an electrode into the weld–with wire being used to join the two metal objects together as a filler material.
An electric current flows through the filler wire to produce an arc. While it’s touching the metal being welded, the arc is generated. With this short-circuit welding process, you move the gun at a steady speed along the joint upon starting the arc until the job is done.
Pros with welding technician training may know that MIG welding is effective on many thicker types of sheet metal. It’s also a lot easier to pick up as a trade, and a faster process than the more precise art of TIG welding.
What Is TIG Welding?
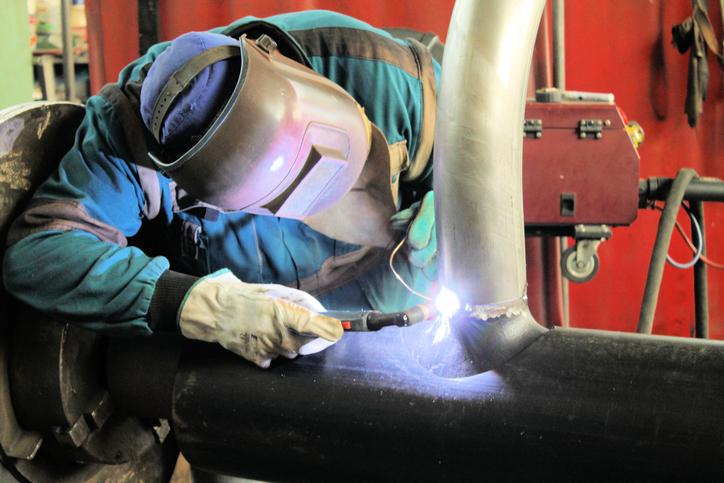
If you’re interested in attending welding school, you’ll eventually hear about the more finicky art of tungsten inert gas (TIG) welding. Here, the metals you’re looking to weld together need to have a tungsten electrode running a current through them. Once the metals have been liquefied by the heat of the electrode, you join the pieces together by putting filler material into the weld puddle.
Unlike the one-handed use of a MIG welder, TIG welding requires both of your hands for the filler and the torch, since they are separate here. You control the electricity coming to your torch via a foot pedal, which allows for a level of deep penetration and accuracy that prevents the arc weld splatter that can result from a more basic MIG job.
In order to feed the wire, you must have a steady hand and stay extremely focused while moving through the weld. The level of control made possible by this procedure allows for a much cleaner weld—perfect for high precision, more advanced jobs. With TIG welding, you don’t even necessarily need filler material to get a successful join.
How to Decide Which One to Use After Welding Technician Training
With any weld job, looking at some key components of the work at hand will help you decide whether to use the MIG or TIG approach. Cost is your first consideration, with TIG jobs typically being much more time consuming, and therefore more expensive to complete. To execute fast and low-cost jobs, MIG is best.
The thickness of the metals you wish to weld is next on the list, with MIG welds generally being much more effective on thicker, bigger pieces of sheet metal than TIG. Finally, you should consider the aesthetics of the job. Welding requiring any filler material is usually a messier procedure. The precise metal-to-metal welds that TIG welding can enable is splatter-free, allowing for the smooth, neater surface you’re looking for.
When talking about MIG and TIG welding, it’s really not possible to say that one type of welding is definitively better than another. Both procedures are necessary in the world of liquefying and joining metals, and both take a good deal of training to master—with MIG being the more basic starter skill that can later lead to performing the more precise art of TIG welding.
Are you interested in pursuing a thriving career by taking professional welding classes?
Contact North American Trade Schools today for more information on its exciting welding diploma program!
How Those Considering a Home Inspector Career May Play a Role in Real Estate Transactions
October 01, 2020
When a buyer is ready to make an offer on a house, the next step is usually to hire a home inspector. The inspector’s job is to take a thorough, objective look at the property in question–from its roofing, structure, electrical and heating, to its air conditioning, plumbing, and siding to ensure the home is in solid condition.
While clearly in the buyer’s interest, the home inspection process makes most sellers nervous–with its potential to put a wrecking ball to a real estate transaction. A home inspection can even prove to be a disservice to the buyer if the job is poorly executed. For instance, an inexperienced or careless inspector can kill the deal by unnecessarily alerting the buyer to trivial issues. This can draw up a long list of minor problems in the final inspection report without adequately explaining the relative importance of these issues.
The right training teaches an inspector the most crucial aspects of the home inspection to focus on, and how to put minor defects into context to ensure the buyer’s confidence isn’t compromised, and the deal isn’t sabotaged.
What Exactly Does a Home Inspector Do?
Paid solely by the buyer, the job of the inspector is to conduct an objective evaluation of the home to make sure there are no issues with the functioning of the systems and components of the house, and that there are no existing safety hazards anywhere on the property.
Anyone wishing to become a home inspector will learn how to pay special attention to the building’s foundation and siding to make sure there’s no presence of cracks, warping, or rotting. The roof is another focal point, needing careful examination to exclude problems with shingles or gutters.
Inspectors must also ensure the home’s plumbing is leak-free, and that the water heater, wiring, heating systems, and any existing fireplaces are in safe working condition. The process usually takes no more than two to three hours, but can take longer if issues concerning compliance with building regulations are revealed.

Once the A-Z’s of the home have been examined, the home inspector is responsible for preparing an inspection report for the buyer. This document represents the condition of the home at the time of the inspection. The report also serves to list any defects that may need repairs. From the report, a buyer can make an informed decision on whether or not to complete the real estate transaction with the seller.
Why is Training Crucial for Someone Wishing to Become a Home Inspector?
Real estate professionals often complain about home inspectors that go too far with the inspection by raising attention to every tiny issue, and potentially causing irreparable damage to the buyer’s confidence.
A less helpful inspector might provide a long list of superficial issues – anything from minor surface mold, to cracked tiles, loose fixtures, and chipped paint – without explaining the minor importance of these issues, and the relatively low cost of fixing them.
Pros with home inspector training are taught to understand the weight that they carry in the real estate transaction, and learn the importance of focusing on major construction and systems points to consider on behalf of the buyer. They are given clear direction, for example, on how to detect signs of non-performance due to old age, weather damage, and poor workmanship. Additionally, trainees learn the importance of providing context to the buyer when revealing more minor defects, so the buyer isn’t unnecessarily scared off an otherwise superior build by a slew of minor, low-cost repairs.
What Does it Take to Become a Home Inspector?
A person with an interest or background in residential construction, as well as strong technical writing and time management skills would be an excellent candidate for home inspection training.
It might also be helpful to have some general people skills for dealing effectively with home buyers and real estate agents. Additionally, some engineering knowledge can be handy to correctly evaluate properties and follow established procedures more closely.

An inspector with the right training can provide an invaluable service to home buyers and gain a great reputation in the industry, leading to consistent recommendations and a steady flow of work.
Interested in training for a home inspector career to join this exciting and growing profession?
Contact North American Trade Schools to find out more!
5 Facts About Residential Wiring for Those Interested in Electrical Training
September 29, 2020
If you’re considering becoming an electrician, you might be surprised by the variety of standards and regulations set in place for wiring systems in residences such as homes and cottages. Homes contain a variety of appliances and safety features which require electrical wiring. Hydro One, Ontario’s electricity provider, has a number of specifications in place for how they are to be installed within the home.
Here are five things to consider with regards to residential wiring.
Wiring Sizes May Be Different for Residences
For residences, common wire sizes may be different from other types of buildings. The American Wire Gauge Number (AWG) serves as the standard measurement of a wire’s diameter. Residences typically use four kinds of AWG wire sizes, with different amp circuit numbers for each: 8 (40 amp circuits), 10 (30), 12 (20), and 14 (15). The No. 8 AWG is often used for loads like electric ranges. No. 10 is used for loads needing electricity, such as dryers and electric water heaters. No. 12 serves loads like kitchen counter receptacles (e.g. appliances like microwaves). And No. 14 works best with loads such as lights (eg. lamps), switches, smaller appliances, and receptacles. Electrical box sizes may also vary, but this depends on several factors. These include the mounting of switches or receptacles, how many wire conductors are present, how many are in use, and the conductors’ sizes.
Many Different Appliances Require Electrical Installation in a Home
The home has a variety of appliances which have different electrical installation needs. The oven, refrigerator, dishwasher, counter spaces, built-in microwave ovens (and possibly more) all require consideration when planning for residential wiring. These appliances typically require their own, separate receptacle, from an entirely different circuit. As those with electrician training may know, any receptacle with 15 to 20 amp circuits must not only be marked, but tamper-resistant. This is because inserting any conductive object that is not a plug into the receptacle can cause electric shock. However, Hydro regulations state that, if a stationary appliance’s receptacle is a minimum of two metres above ground and/or out of reach, tamper resistance is not necessary. Prior to installation, be sure to mark on your floor plan where these appliances—and their corresponding receptacles—are located.
Different Rooms Within the Home Require Different Wiring Configurations
If you’ve completed maintenance electrician training, you will need to follow many requirements when working on residential homes. Hydro One has a set of requirements for each room in the house to ensure safe living conditions for residents. For one, each room must be equipped with a light controlled by a light switch. Two lights controlled by a three-way wall switch—one for the bottom and the top each—is required for any stairway containing a minimum of four stairs. Keep in mind that, on any two-wire branch circuit, 12 outlets are allowed at maximum. This includes receptacles and lights. Range receptacles must also be installed in the home with their receptacles marked on the floor plan.
Those With Electrician Training Should Plan to Install Smoke Alarms
Smoke alarms are an important and necessary safety feature for homes. They are required to be installed on each of the home’s floors, and a battery backup should also be present. Additionally, there should be one in each bedroom and an additional alarm in hallways attached to them. These smoke alarms must all be interconnected and should operate at 120 volts. Either a branch circuit with a receptacle/lightning combination or an unswitched lighting branch circuit can be used for these alarms.
Service Size May Depend on the Requirements of the Home
Typically, homes should have a distribution panel containing 24 circuits, and a service size of at least 100 amps. When calculating the service size, take into account the kilowatt demand. There are multiple factors which help to determine this, such as electric heating, the area of the floor, and appliances, among other loads that may be present. Although the service size should be larger if a home requires greater amounts of heating, most homes with a minimum 100-amp service size should be able to maintain both their typical electrical loads and electrical heating of up to 10 kW.
Do you want to become a construction electrician?
Check out North American Trade Schools’ programs today!
What Those with HVAC Technician Training Should Know About the Benefits of Preventative Maintenance
September 15, 2020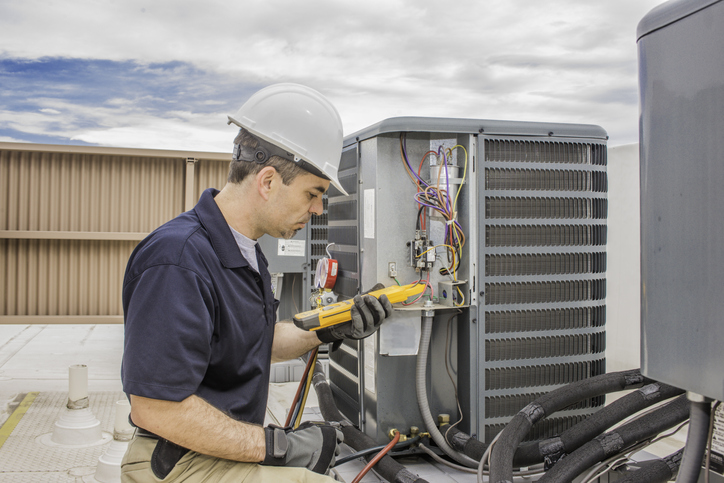 There’s nothing worse than the AC breaking down on a blazing hot day—apart from maybe the heating system fizzling out when it’s a frigid -30 degrees! HVAC technicians become very popular individuals at the height of summer and winter, serving to rescue home and business owners from uncomfortable temperatures by performing emergency repairs as they come up.
Keeping HVAC units in good working order through routine checkups is another important role of the technician. Here’s why routine maintenance practices are important for keeping these systems in their best shape all year round!
Routine Maintenance Helps Owners Breathe Easier
Respiratory problems like asthma and bronchitis can often be traced back to the living conditions of the home, with the dirty HVAC unit a prime culprit in many cases. The problem comes from condensation forming in the coils and ducts of the AC unit, which can lead to all kinds of harmful mold and bacteria growth.
Customers who keep to a routine maintenance schedule for their HVAC units are ensuring that all of the harmful contaminants that may have built up inside the system are eliminated. A service technician is responsible for cleaning filters, coils, and other components of the unit on a routine visit, which leads to a cleaner unit, thereby improving air quality.
A Well-Maintained System Can Save the Owner Money
What would a home or business owner care more about than breathing clean air? How about more money in the old pocketbook! If you’re interested in HVAC technician training, you should know that keeping an HVAC system in good working order can help the owner save money by optimizing efficiency to keep energy costs down. A well-maintained HVAC system uses a lot less energy and puts less wear and tear on the machinery of the HVAC unit, running a good 20% more efficiently than a neglected unit.

Regular checkups in the fall and spring can keep efficiency strong, and help an owner get a good ten years out of their HVAC investment. Routine checkups also allow the service tech to catch a small problem needing a quick, inexpensive fix before it turns into a much more complicated problem requiring lots of work—and lots of coin to repair.
Fewer Emergency Breakdowns and More Warranty Opportunities
People run their HVAC systems pretty hard in the summer and winter months, which can lead to breakdowns. These machines are designed to handle the energy levels the owner demands, but only if the unit is being looked after properly. If you’re seeking your HVAC diploma, you should know that breakdown prevention during the hottest and coldest times of the year is reliant on keeping routine maintenance and inspection checks.
By keeping up regular twice-a-year visits, the owner may even be lucky enough to discover that a part that needs work or full replacement is still under warranty. Longer waiting times between visits reduce the opportunity to spot a problem before a warranty period has reached its expiration date.
What Are Some Maintenance Tasks Those Attending HVAC School Should Know About?
There are a few things to watch out for during routine maintenance checks. On heating systems, the tech will need to check: fuel lines and power sources, inspect combustion chambers, inspect the heat exchanger for cracks or other evidence of damage, as well as check for carbon monoxide leaks.
On cooling systems, the tech needs to take a look at the fans and blowers, thermostat, system controls, ductwork systems, evaporator and condenser coils, and condensate drains to ensure everything is clean, undamaged, and functioning properly. Additionally, fans and motors must be lubricated, and refrigerant levels must be filled.
All of these tasks need to be performed at regular intervals to ensure that systems keep running properly.
Are you interested in training at HVAC school?
Contact North American Trade Schools today to learn more!
The Most Sustainable Construction Materials for Those in Construction School
September 08, 2020
Plenty of work has been done over the last few years to make the construction of necessary buildings more sustainable. That includes taking a look at the construction materials themselves. There are different definitions of sustainability in terms of construction materials. It could refer to products that are locally sourced, how resilient a product is, or how much energy it takes to produce it.
Some professionals are looking at material sustainability as a concept that considers all the energy required to extract a material, produce it, and transport it. They also look at its appropriateness for the environment, the rate at which it degrades, and how often it needs to be replaced. Some construction professionals are also moving towards sustainability by incorporating recycled materials. Read on for a few examples of sustainable materials!
Bamboo Could Dominate the Construction Trades
Bamboo is a construction material with a lot of potential. It can be used in walls, flooring, or furniture, and its benefit is that it is extremely durable and strong. It has a greater compressive strength than even bricks or concrete. Its high strength-to-weight ratio means that it is relatively lightweight and takes less energy to transport than many other materials.

Bamboo is a perennial grass and can be found on several continents. Currently, it is mostly grown in South America and Asia. As a grass, its extremely quick rate of self-generation helps its sustainability. It continues to spread and grow without the need to replant it after harvesting it. Professionals with a career in construction should be aware of one potential downside to using bamboo: it requires treatment to make it resistant to insects and rotting.
Sheep’s Wool Is A Natural Construction Material
Sheep’s wool is a material that has been used for all kinds of things for hundreds of years. These days, it can still be beneficial for the construction industry. Sheep’s wool is naturally insulating. And, while it’ll still need extra treatment to make it properly safe with regards to fire risks, it is a material with a naturally high ignition temperature. As a result, it can be an energy-efficient insulator used in walls, ceilings, and attics.
One of the sustainable benefits of sheep’s wool is that it has similar properties to mineral wool or glass wool but requires less energy to produce. It is, of course, naturally regenerating. One of the potential downsides to using this material is that it requires treatment to prevent the infiltration of insects and fungi.
Cork Doesn’t Have a Significant Environmental Impact
Cork comes from the tree bark of the cork oak. After construction school, professionals can use this material as flooring or sub-flooring. It’s very flexible and resilient, a good thermal insulator, and efficient at absorbing noises and shocks, making it an effective construction material.

The benefit of this material is that it’s sourced entirely from natural sources. The cork oak will continue to grow and reproduce the material after it is extracted from it, making it a sustainable resource to use within the construction industry.
Do you want to make your entry into the construction trades?
Contact North American Trade Schools for more information!
2020 Cabinetry and Woodworking Trends Everyone in Cabinet Making School Should Know About
August 27, 2020 Whenever cabinets or woodwork need a fresh, modern update, there are several routes you can take. You can pick certain colours, or mix and match several of them. You can take a minimalist approach to a room’s design, or you can match traditional kitchen aesthetics with more open-concept designs.
Regardless of which route you take, your job as a cabinet maker is to bring these aesthetic decisions to life. If you want to keep it as fresh as possible, consider choosing from any of the trends we’ve listed below!
Here are some cabinetry and woodworking trends in 2020 you should be aware of.
Mixed Colours and Two-Tone Designs Are In for Today’s Kitchen Cabinets
While monochrome colour schemes for cabinets can tend to dominate certain kitchens, mixing them up is among the biggest trends for 2020. In particular, two-tone cabinets are seen as being on the rise, particularly since they can help make the room seem more expansive and dynamic-looking.
Creating a contrast between two different colours for cabinets can also add greater texture to the room and make the design stand out. A move away from traditionally-coloured kitchen cabinets is one that students in cabinet making school shouldn’t be surprised to see–whether it’s a combination of neutral, saturated or bright tones.
Finding Innovative Ways to Make More Storage Room is Another Hot Trend
If your cabinetry or woodworking project involves a living space that is smaller in size, the use of space becomes increasingly important. Therefore, finding ways to create a greater storage capacity and avoid wasting space is something else that should be at the top of your mind for 2020.
One way to do this is with custom cabinets, which can be used to make better use of tight spaces. Another is by getting creative with the cabinetry you’re working on in order to avoid overloading drawers unnecessarily.

For example, you could designate cabinets and drawers for garbage or recycling, have roll-out drawers and trays for varying purposes, or create dividers for kitchen materials such as utensils. With making better usage of space a hot topic in recent months, you have an opportunity to help homeowners do it in practical and clever ways.
Cabinet Making School Students Should Take Note of Open-Concept Designs
Those doing their cabinet making training will surely appreciate how open-concept designs are becoming more of a trend in 2020 as well. This is especially the case with open-frame cabinets and open shelving in kitchens, getting rid of upper kitchen wall cabinets entirely, or a mix of both.

These can look great from a design and aesthetic standpoint (for example, if you’re using rough-cut wood), as well as in helping make the room appear bigger. Better yet, it can put the house owner’s dishes on display for everyone to see, help them be more creative and productive with how they use space on their countertops, and also showcase their penchant for careful placement and organization.
Want to take cabinet making courses?
Contact North American Trade Schools for more information!
Electrical Power Systems in Buildings Explained for Those in Electrician School
August 25, 2020
Have you ever wondered how electricity flows into buildings? An electrical power system helps make this into a reality. With electrical power systems and their parts and conductors, they can vary based on how big or small the building is. The processes used to deliver electricity into those buildings can also differ based on the size and nature of the building. Electrical power is delivered and converted to any load in the building using the electricity. The power being distributed within the buildings can differ depending on both the size of the building using it and the system itself.
Understanding how electricity travels towards outlets in rooms in a building is important to know for your electrician career, as well as the necessary procedures for it to travel efficiently within the building, regardless of size. Here’s what an aspiring electrician should know about electrical power systems in buildings.
Important Facts for Electrician School Students to Know
For any electrical power system, electricity is delivered via conductors, which brings power between two different areas of the building. Usually in electrical cable form, conductors deliver electricity to a load device from a generator, and are often made of copper. It’s typically at extremely high voltages that power is transmitted from the plant to buildings, as this is what is most effective. However, smaller buildings have electricity delivered through a meter with lower voltage numbers via a transformer. A switchgear will then be used to not only be an on-off switch for the circuit (with current flow being either automatic or manual), but also to protect equipment from the power supply. Lastly, a load device such as a heating unit is used to turn electricity into energy types like light or heat.

Larger-Sized Buildings: Bigger Spaces Need Bigger Systems
A big building needs an equally big load of electricity. Electrical equipment must also be proportionately sized for the power it would carry, and a transformer would be used to lower the high voltages coming through it. A switchgear—or multiple ones, if the building needs more than one transformer—then delivers electricity to various parts of the building, via either a bus or feeder. Students in electrician school probably already figure this is the case, but large-scale buildings need more power, and electrical systems for these types of buildings are used to study factors like load flow to ensure the conductors and equipment are sized accordingly. With taller buildings such as high-rise apartment complexes, high-voltage lines can be brought into the building in order to place different transformers in rooms on different floors.
Smaller-Sized Buildings and Residences: A Simpler Process for Power
Those in electrician training may already know that smaller buildings and homes do not have a very complex system for distributing electricity. In these instances, either a utility pole or a pad will have the transformer attached to it–reducing the voltage before power goes to the meter. About 13,800 volts from the utility is significantly reduced, with power later going from the meter into the building. It then travels to a panel board with a series of breakers. Various circuit-based components in a home, such as lights or electrical outlets, will have this power flowing toward it. Residential homes often use low voltages of electricity, ranging between 110 and 260 volts. Smaller buildings such as low-rises tend to use step-down transformers, which reduce voltage to various levels depending on the size of the device using it.
Do you want to start your maintenance electrician training?
Contact North American Trade Schools to learn more!

When you first look at welding symbols, you may be overwhelmed by the seemingly arbitrary shapes and numbers. However, despite what you initially think, these symbols do have deeper meaning—and knowing this meaning will work wonders for your future welding career.
These symbols are often found on welding project blueprints, and are used to communicate between the designer and the welder. Without understanding these symbols, you won’t know what specifications a weld requires.
If you’re interested in becoming fluent in the language of welding symbols, read on!
Welding Symbols 101 for Those in Welding Training
Welding figures generally consist of five main figures: arrow, leader line, reference line, tail, and weld symbol (not to be confused with the welding symbol, which represents the entire diagram). Confused yet? Let’s explain them figure by figure.
The arrow, for starters, points to the part of the diagram where the weld is needed. Attached to the arrow is the leader line, which intersects with the reference line. In the middle of the horizontal reference line is the weld symbol: this represents the type of weld required. Finally, at the opposite end of the reference line, you may find the tail—it is only required for special instructions—which forks off in opposite directions.
How to Interpret Welding Symbols
As you’ll learn in welding training, the location of the weld symbol vis-à-vis the reference line determines which area of the joint you should perform the weld.
If the weld symbol is under the reference line, you should make the weld on the same side as the arrow. However, if the weld symbol is located above the reference line, you should make the weld on the opposite side of the arrow. But if the symbol is on both sides of the reference line, then, as you can imagine, you must perform the weld on both sides.
Understanding Dimensions and Angles in Welding Symbols
In addition to shapes and lines, welding symbols can also include numbers that communicate the depth, diameter, and length of a weld–along with the beveling angle, if applicable.
In many cases, you will find the weld diameter (or width) on the left-hand side of the weld symbol. The length of the weld is found on the right. If the length is not indicated on the welding symbol, you should conduct the weld from the beginning of the joint to the end.
The reference line also plays a part in understanding the dimensions of a weld, just as it did for the weld type. Any dimensions indicated below the reference line pertain to the joint on the side of the arrow. Dimensions above the reference line pertain to the joint on the opposite side. If dimensions are indicated on both sides of the reference line, then you should weld both sides of the joint.
If these numbers, figures, and placements seem complicated, fret not—welder technician training is there to help you decipher these symbols with ease.

Do you want to get your welding diploma?
Contact North American Trade Schools to get started!
